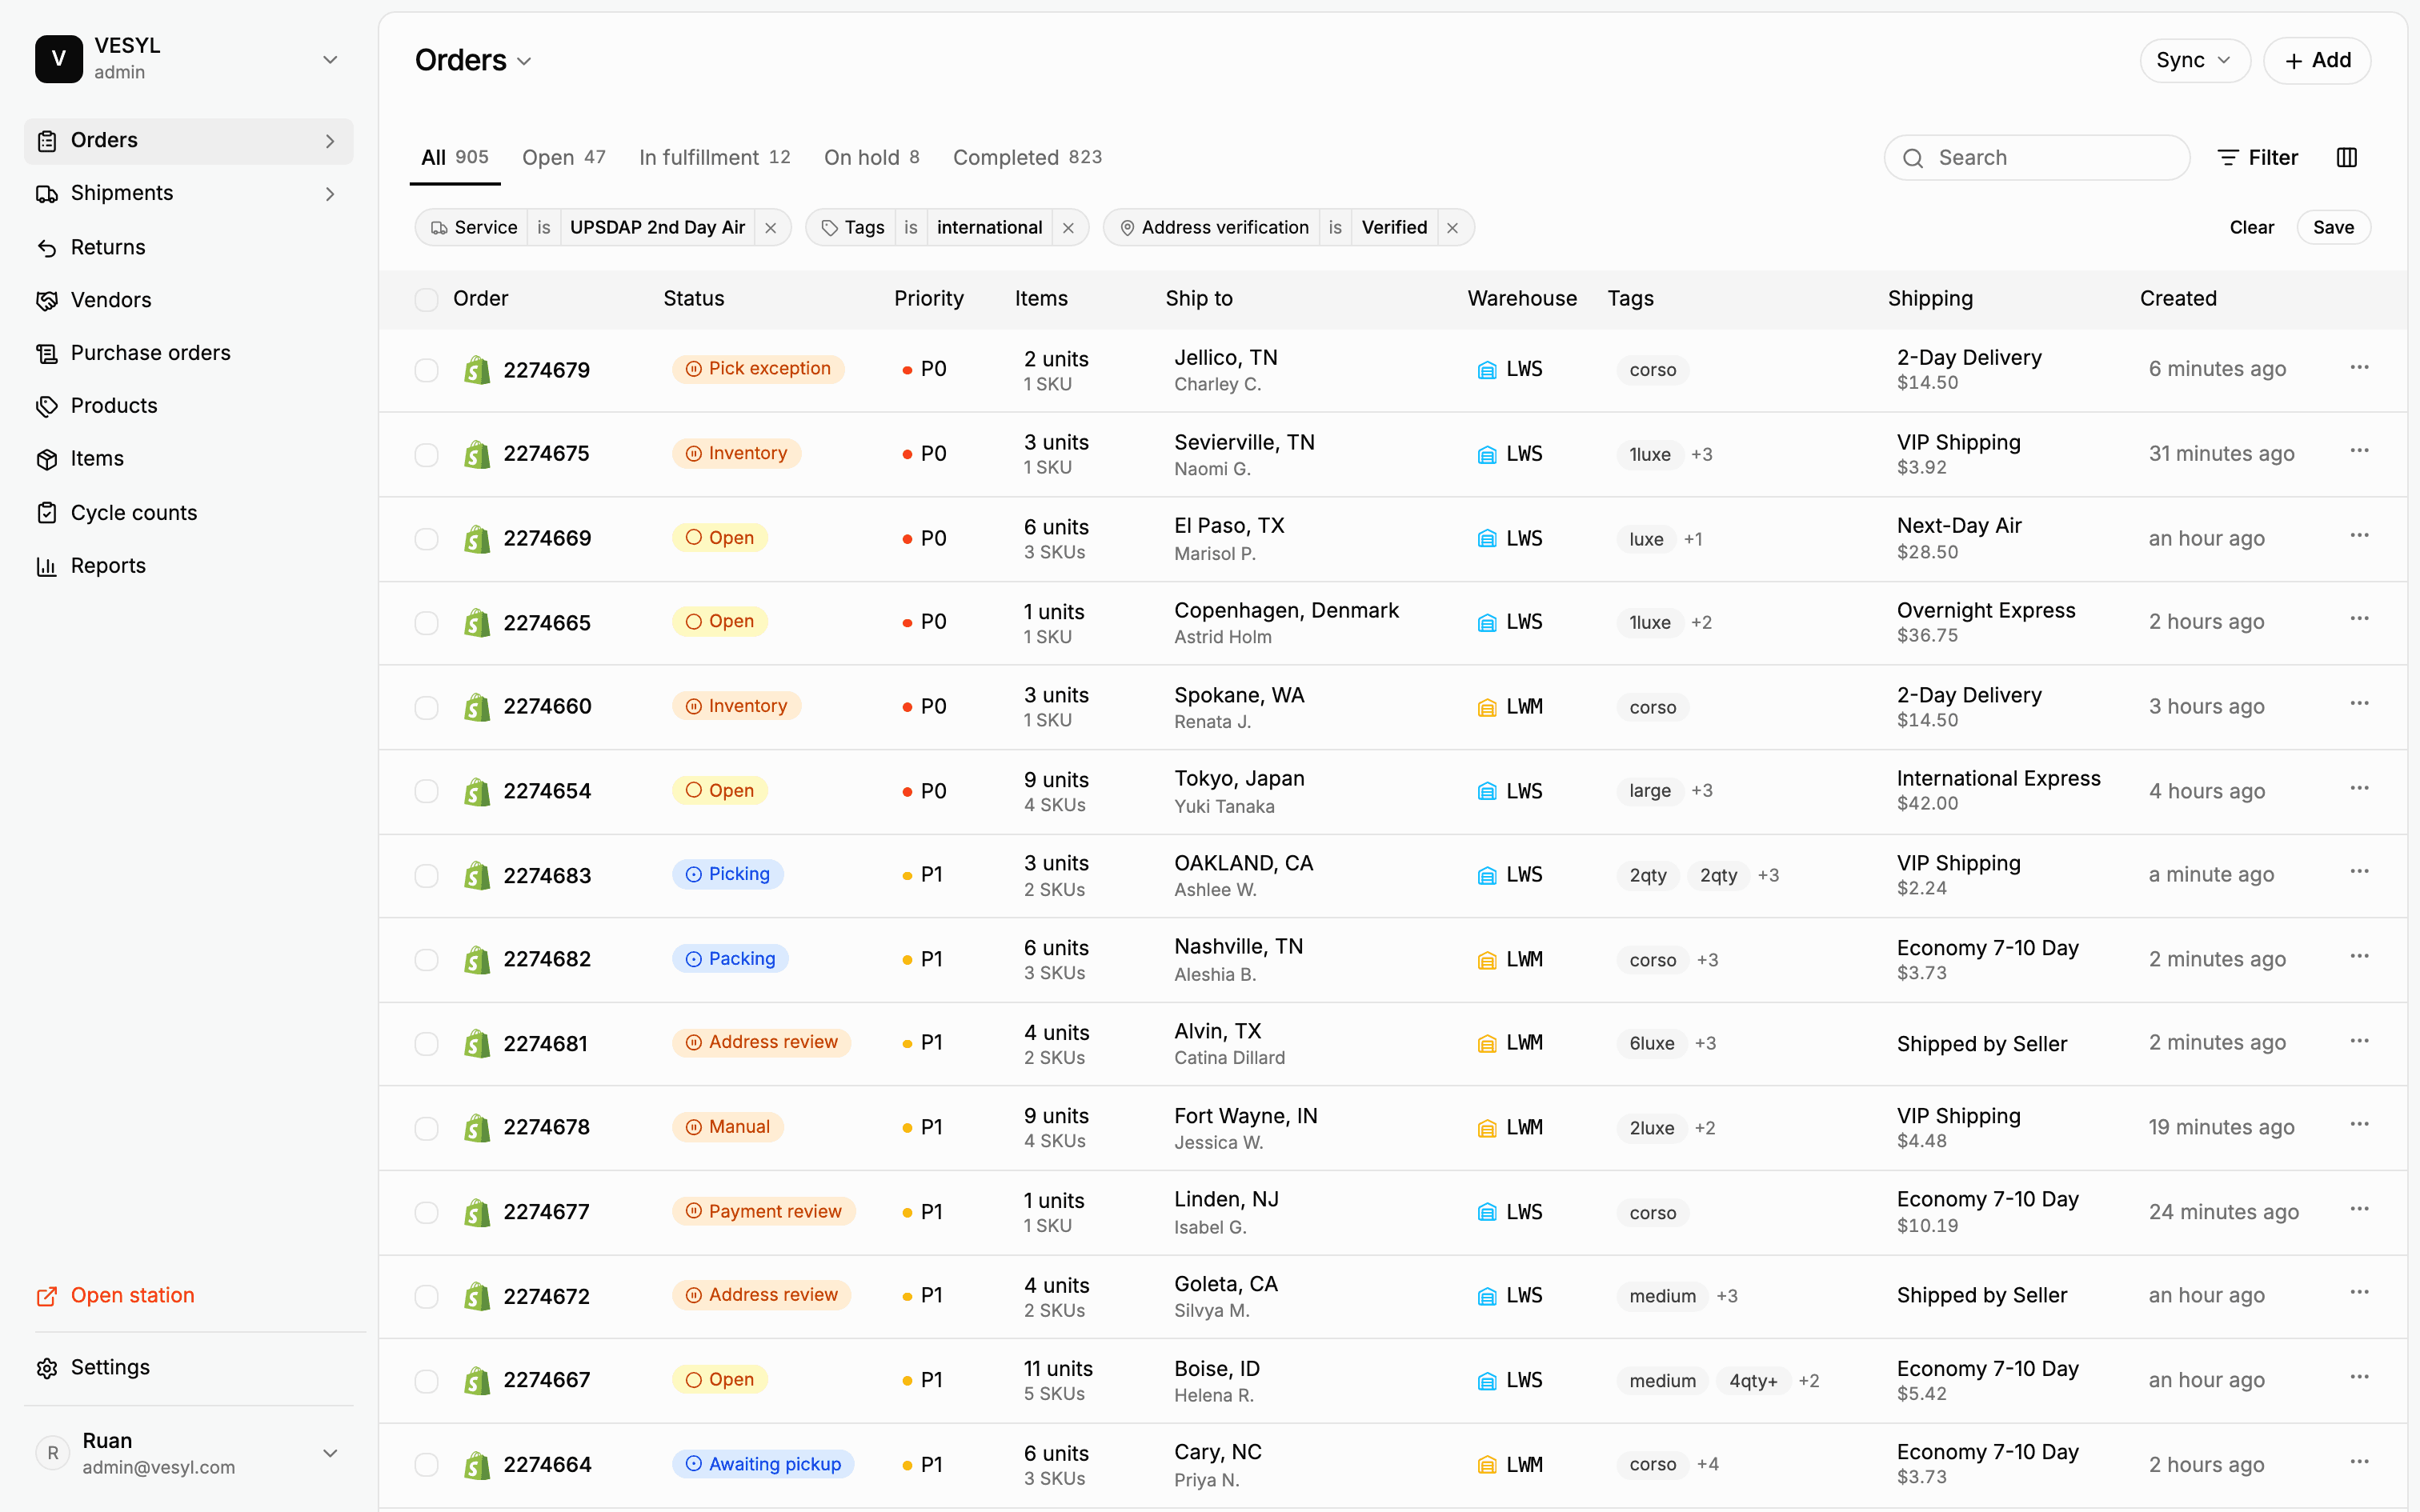
VESYL
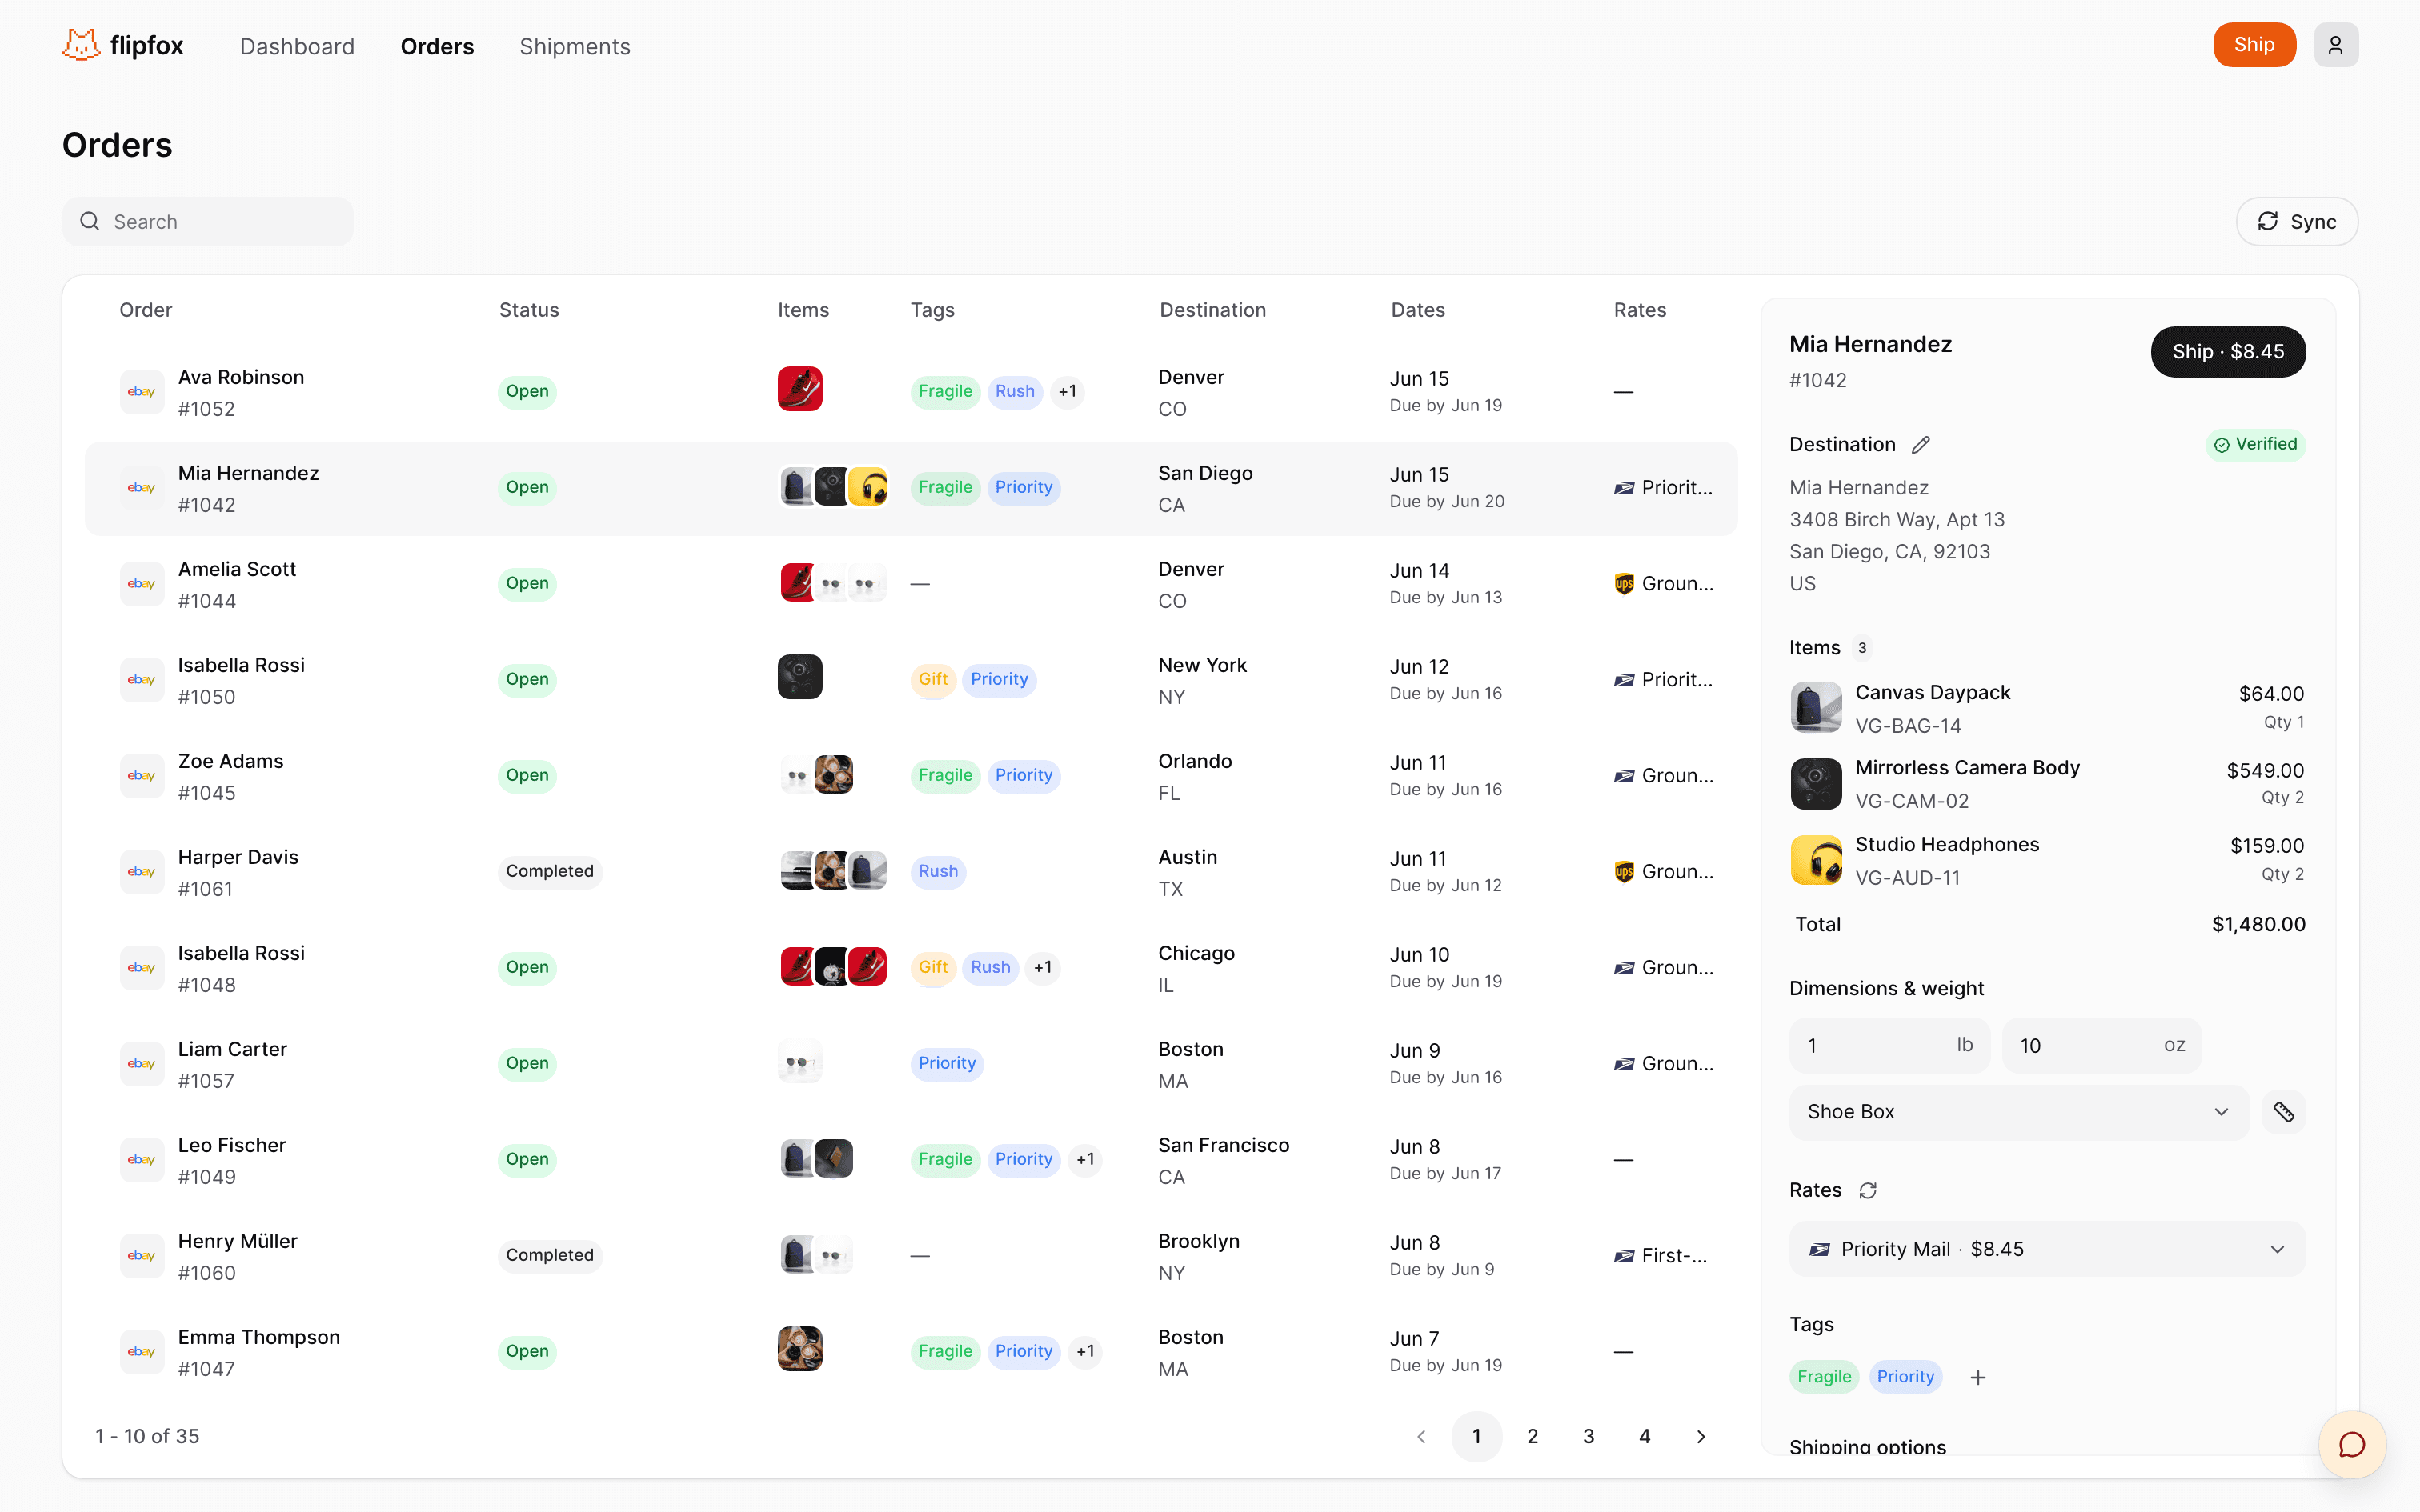
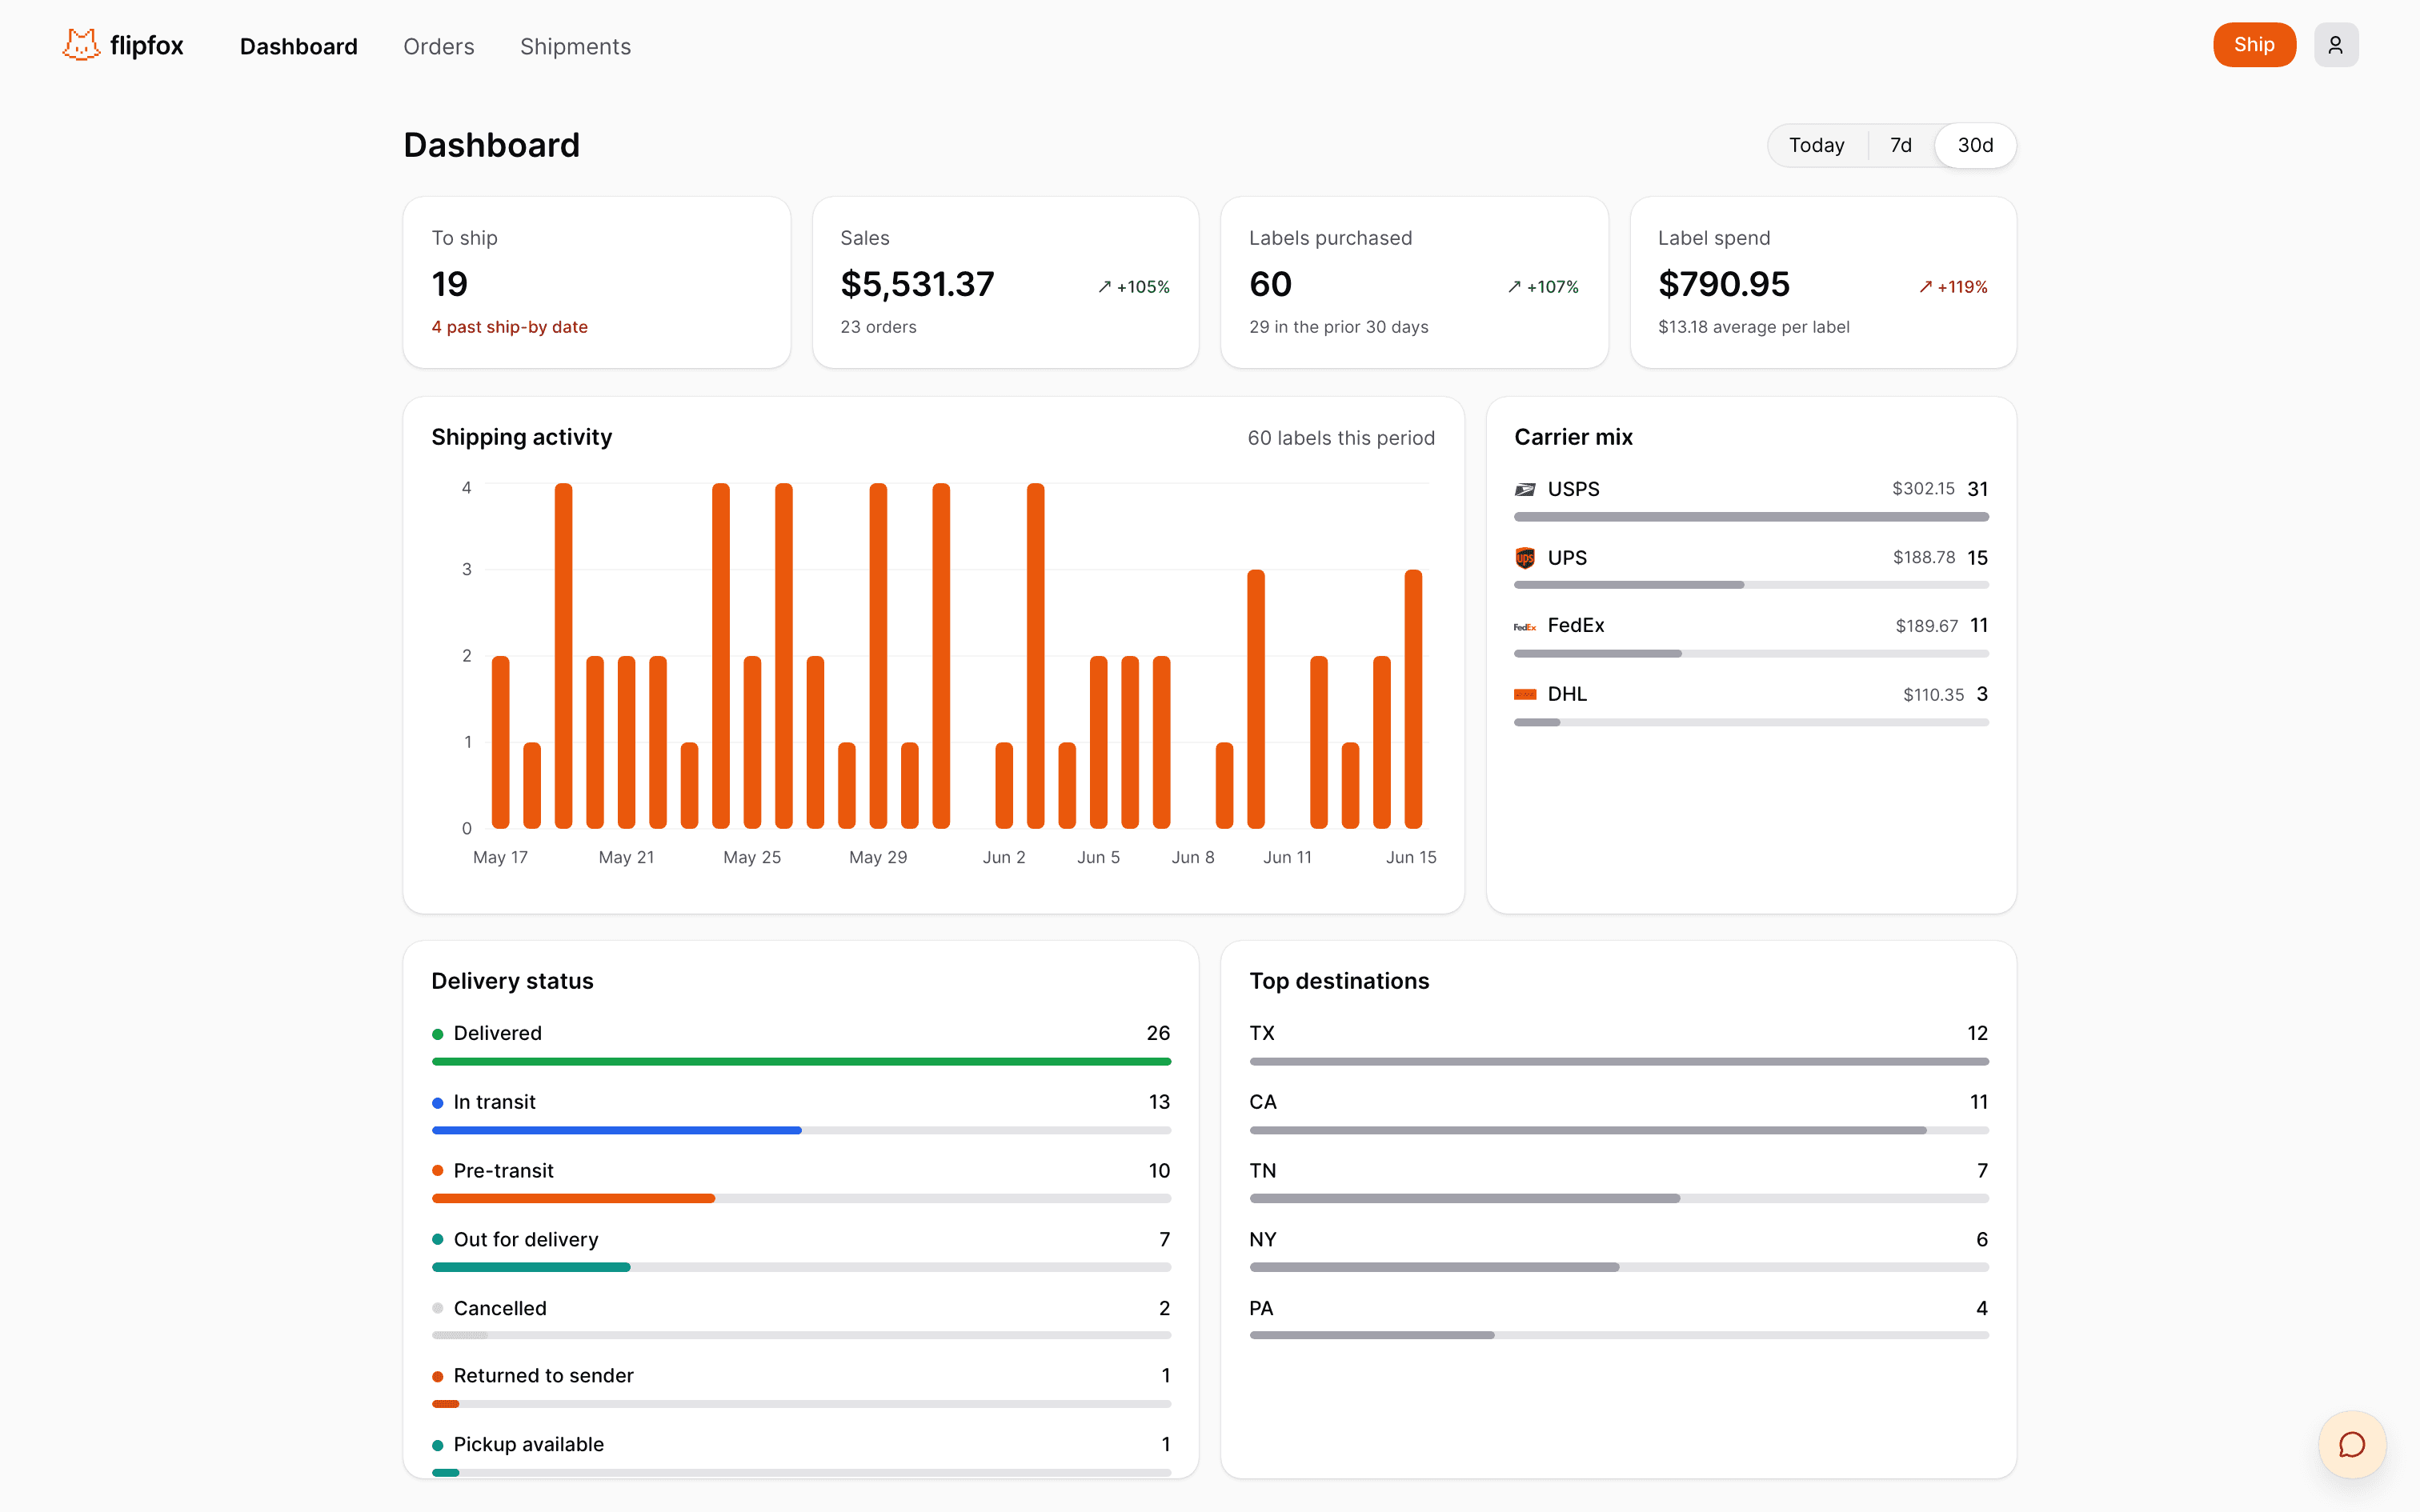
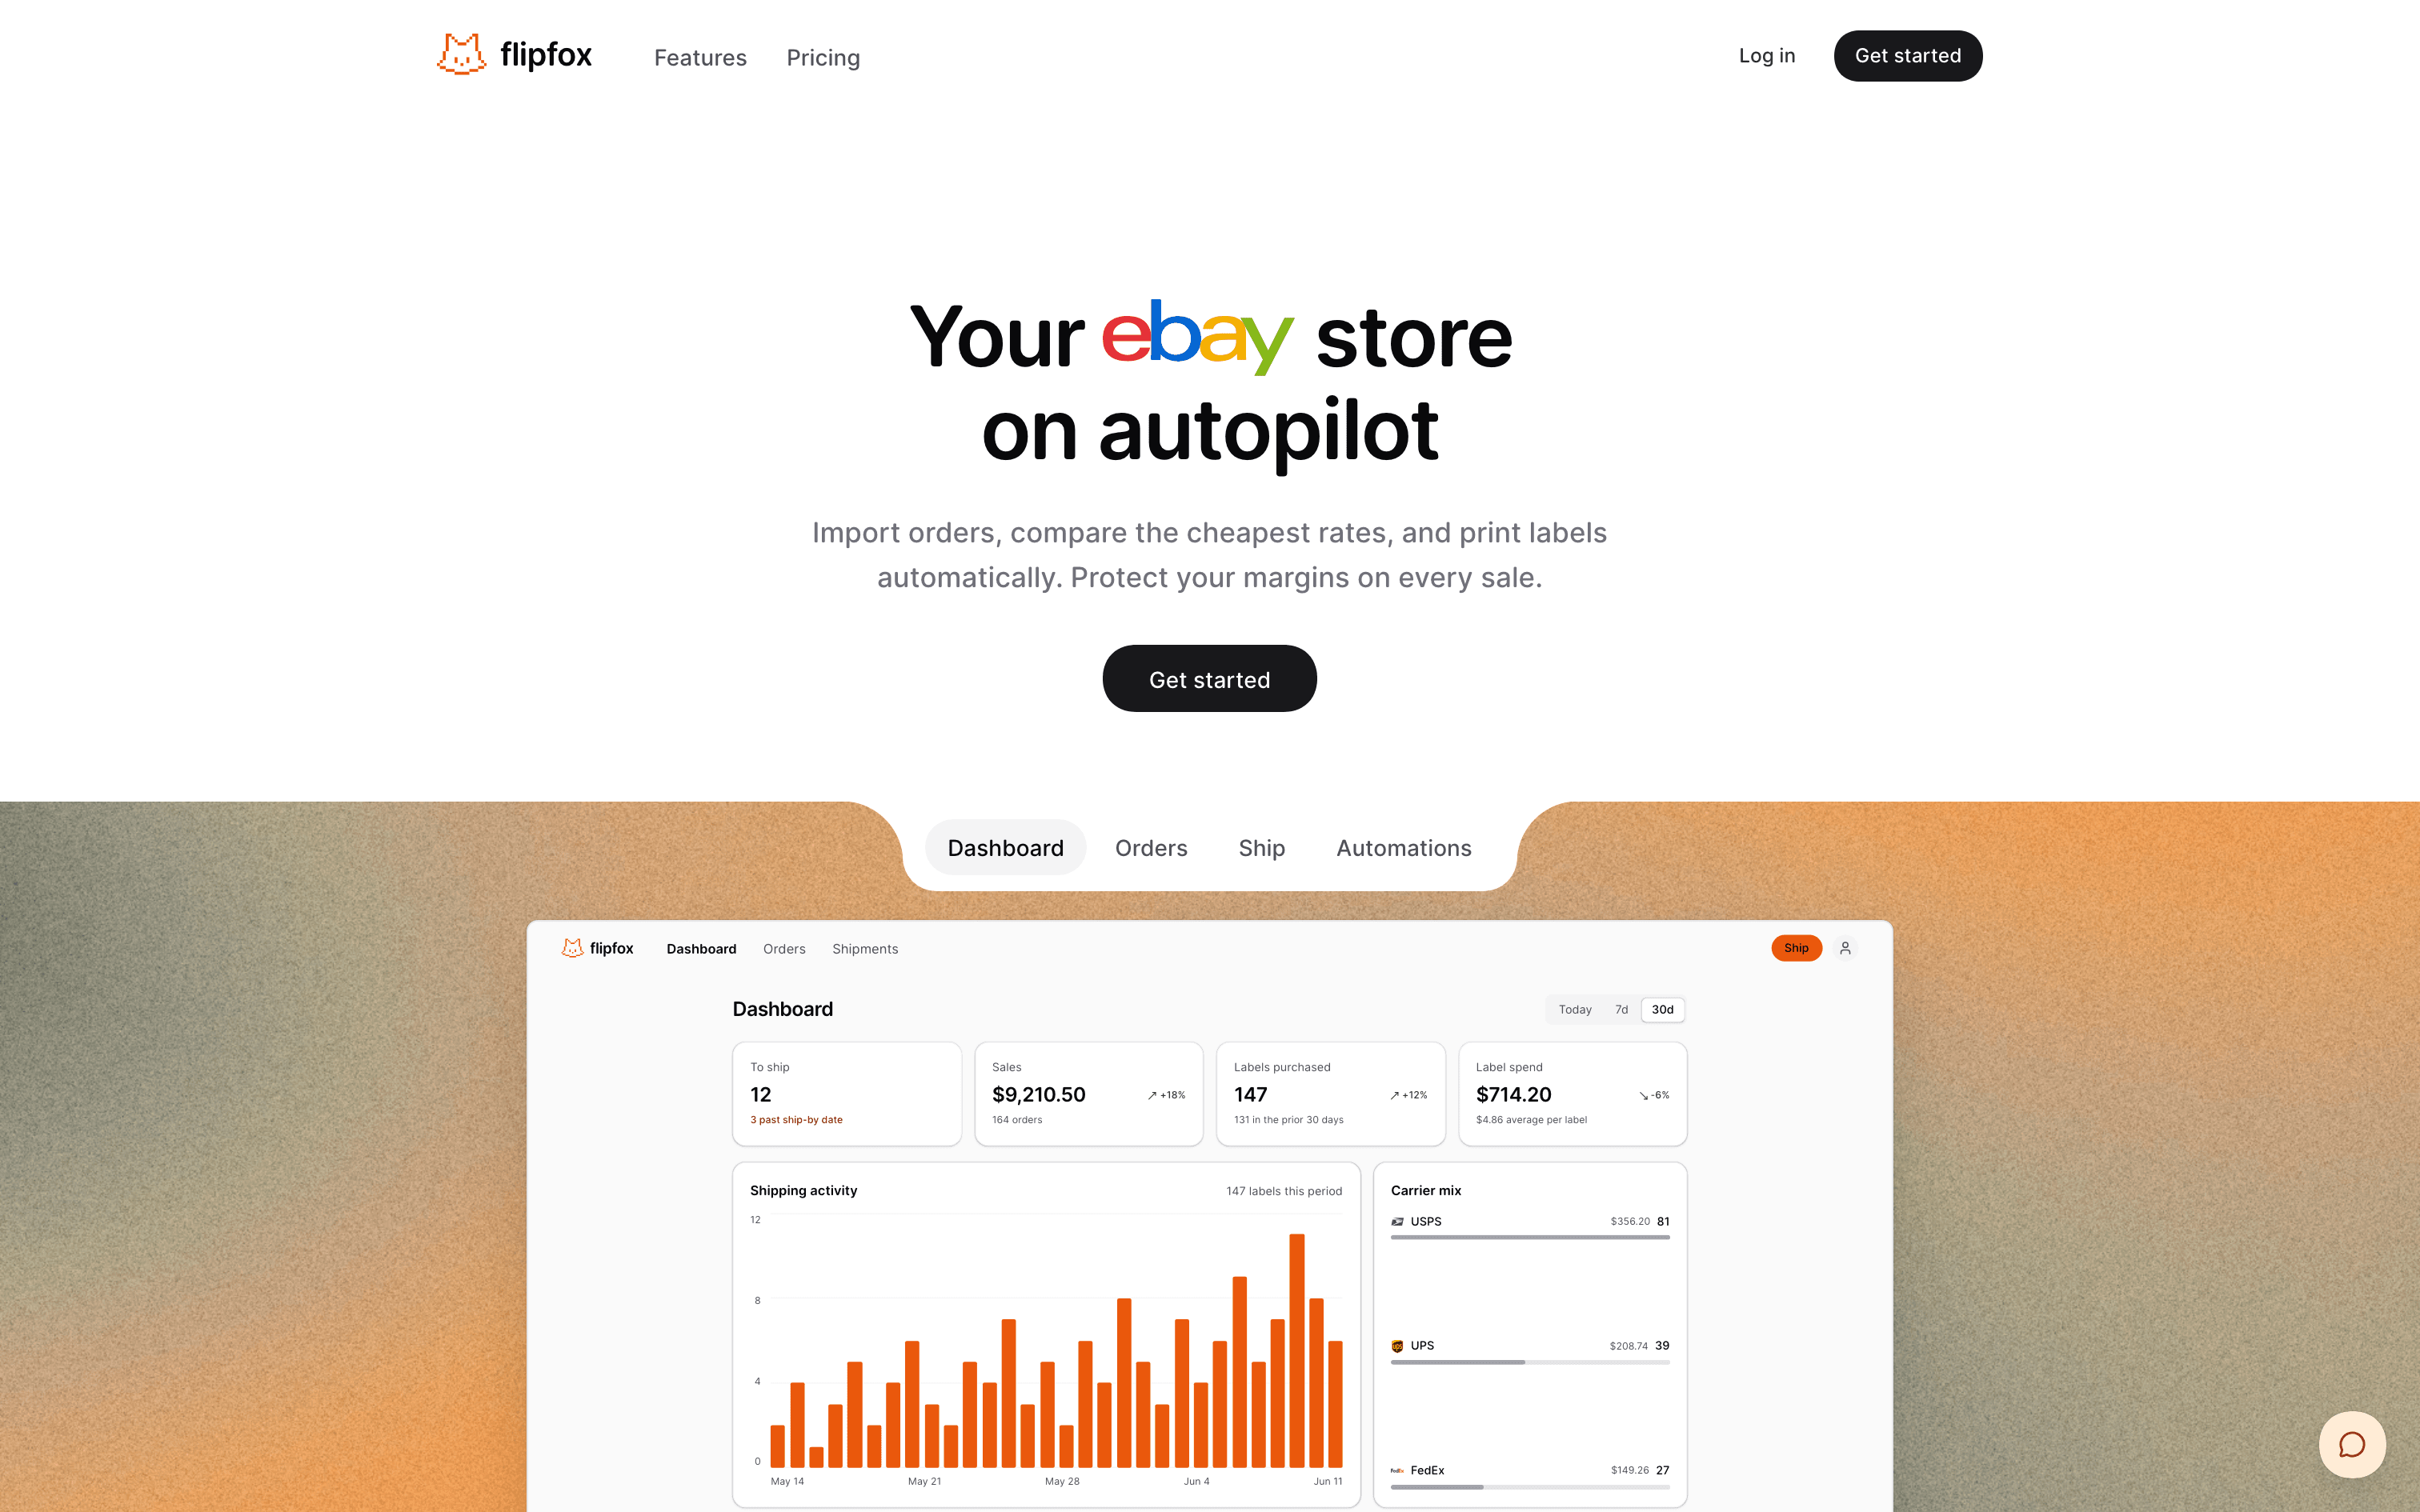
Flipfox
Flipfox
Flipfox
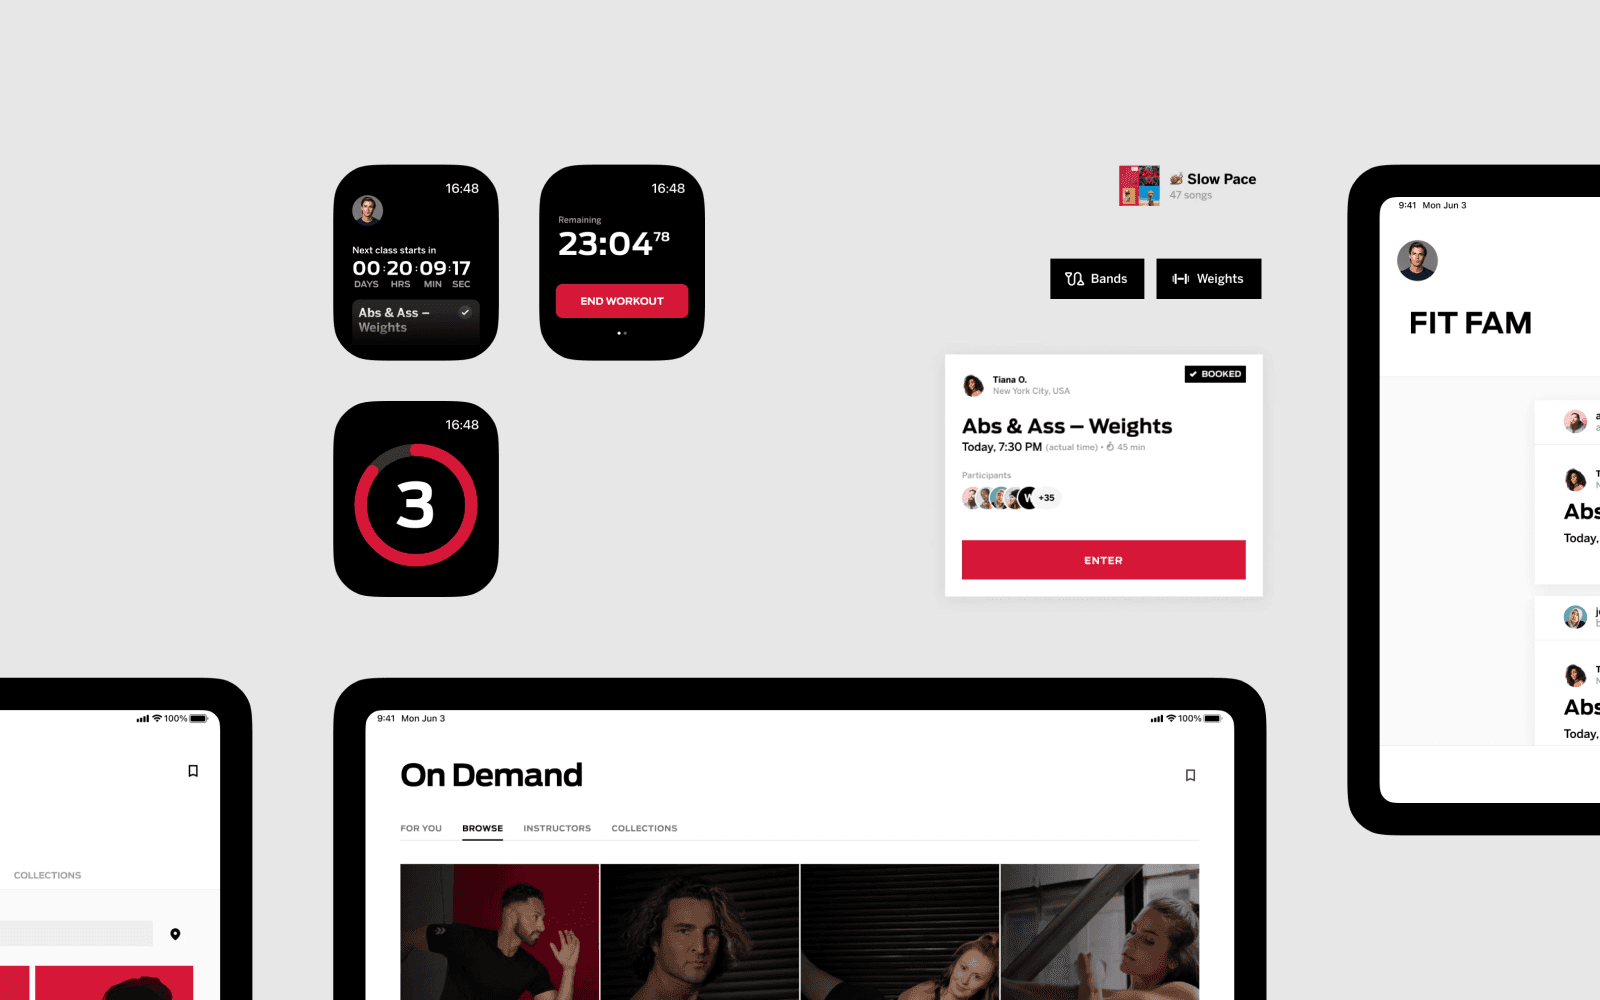
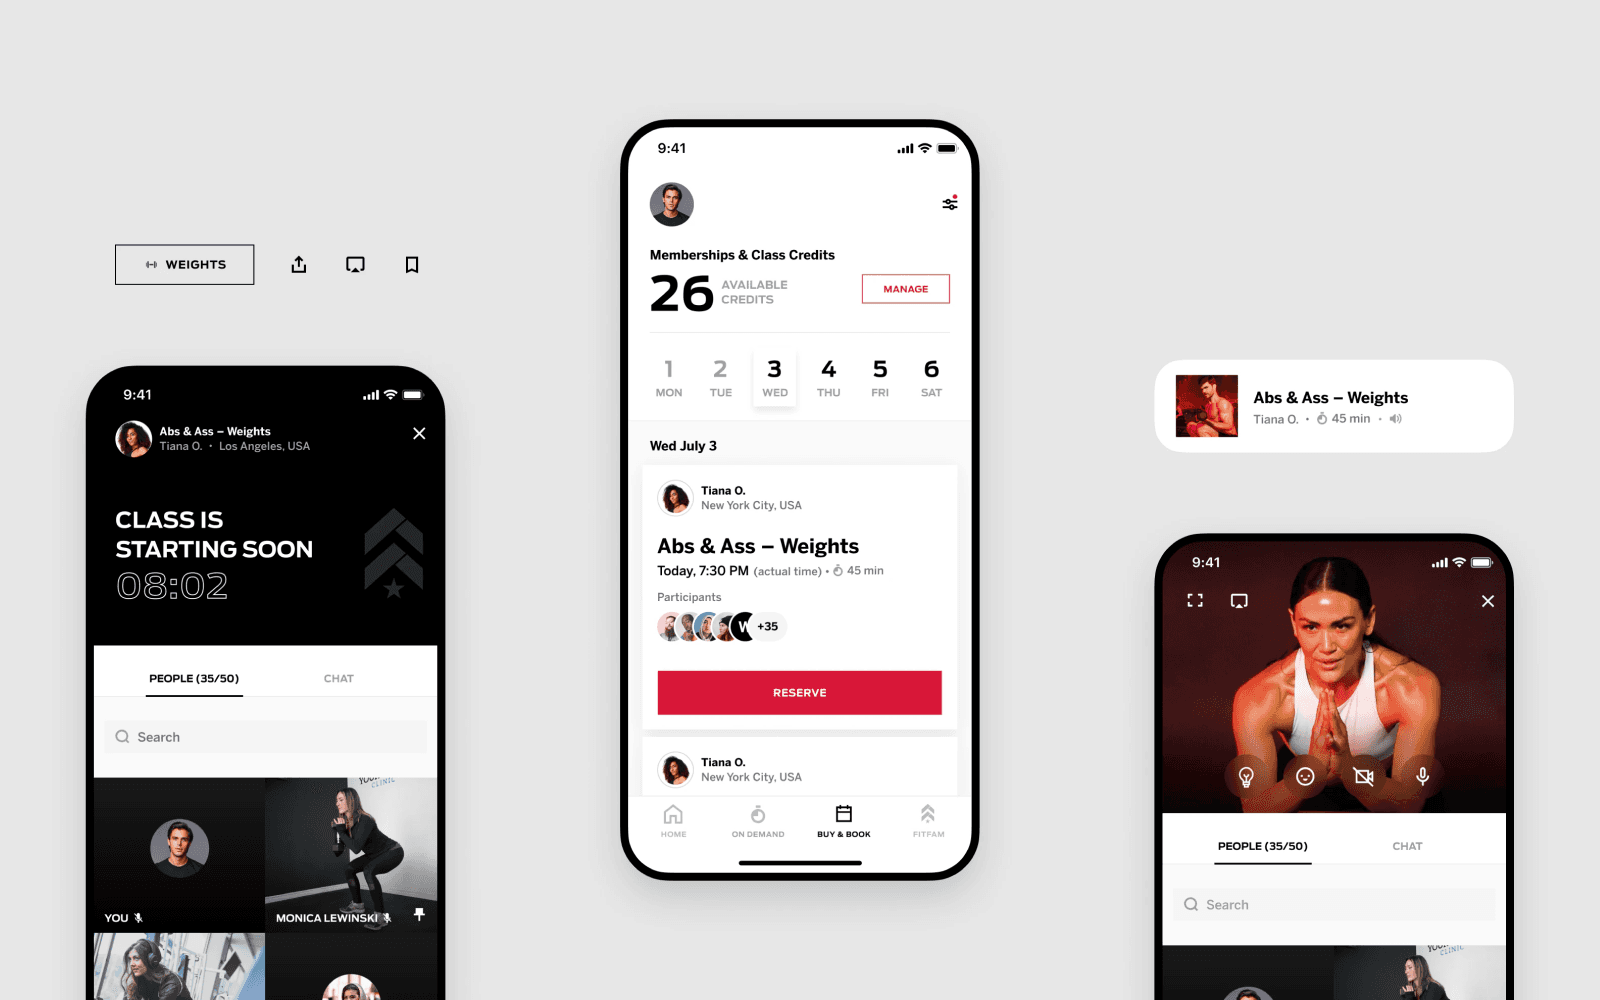
Barry's X
Barry's X
Barry's X
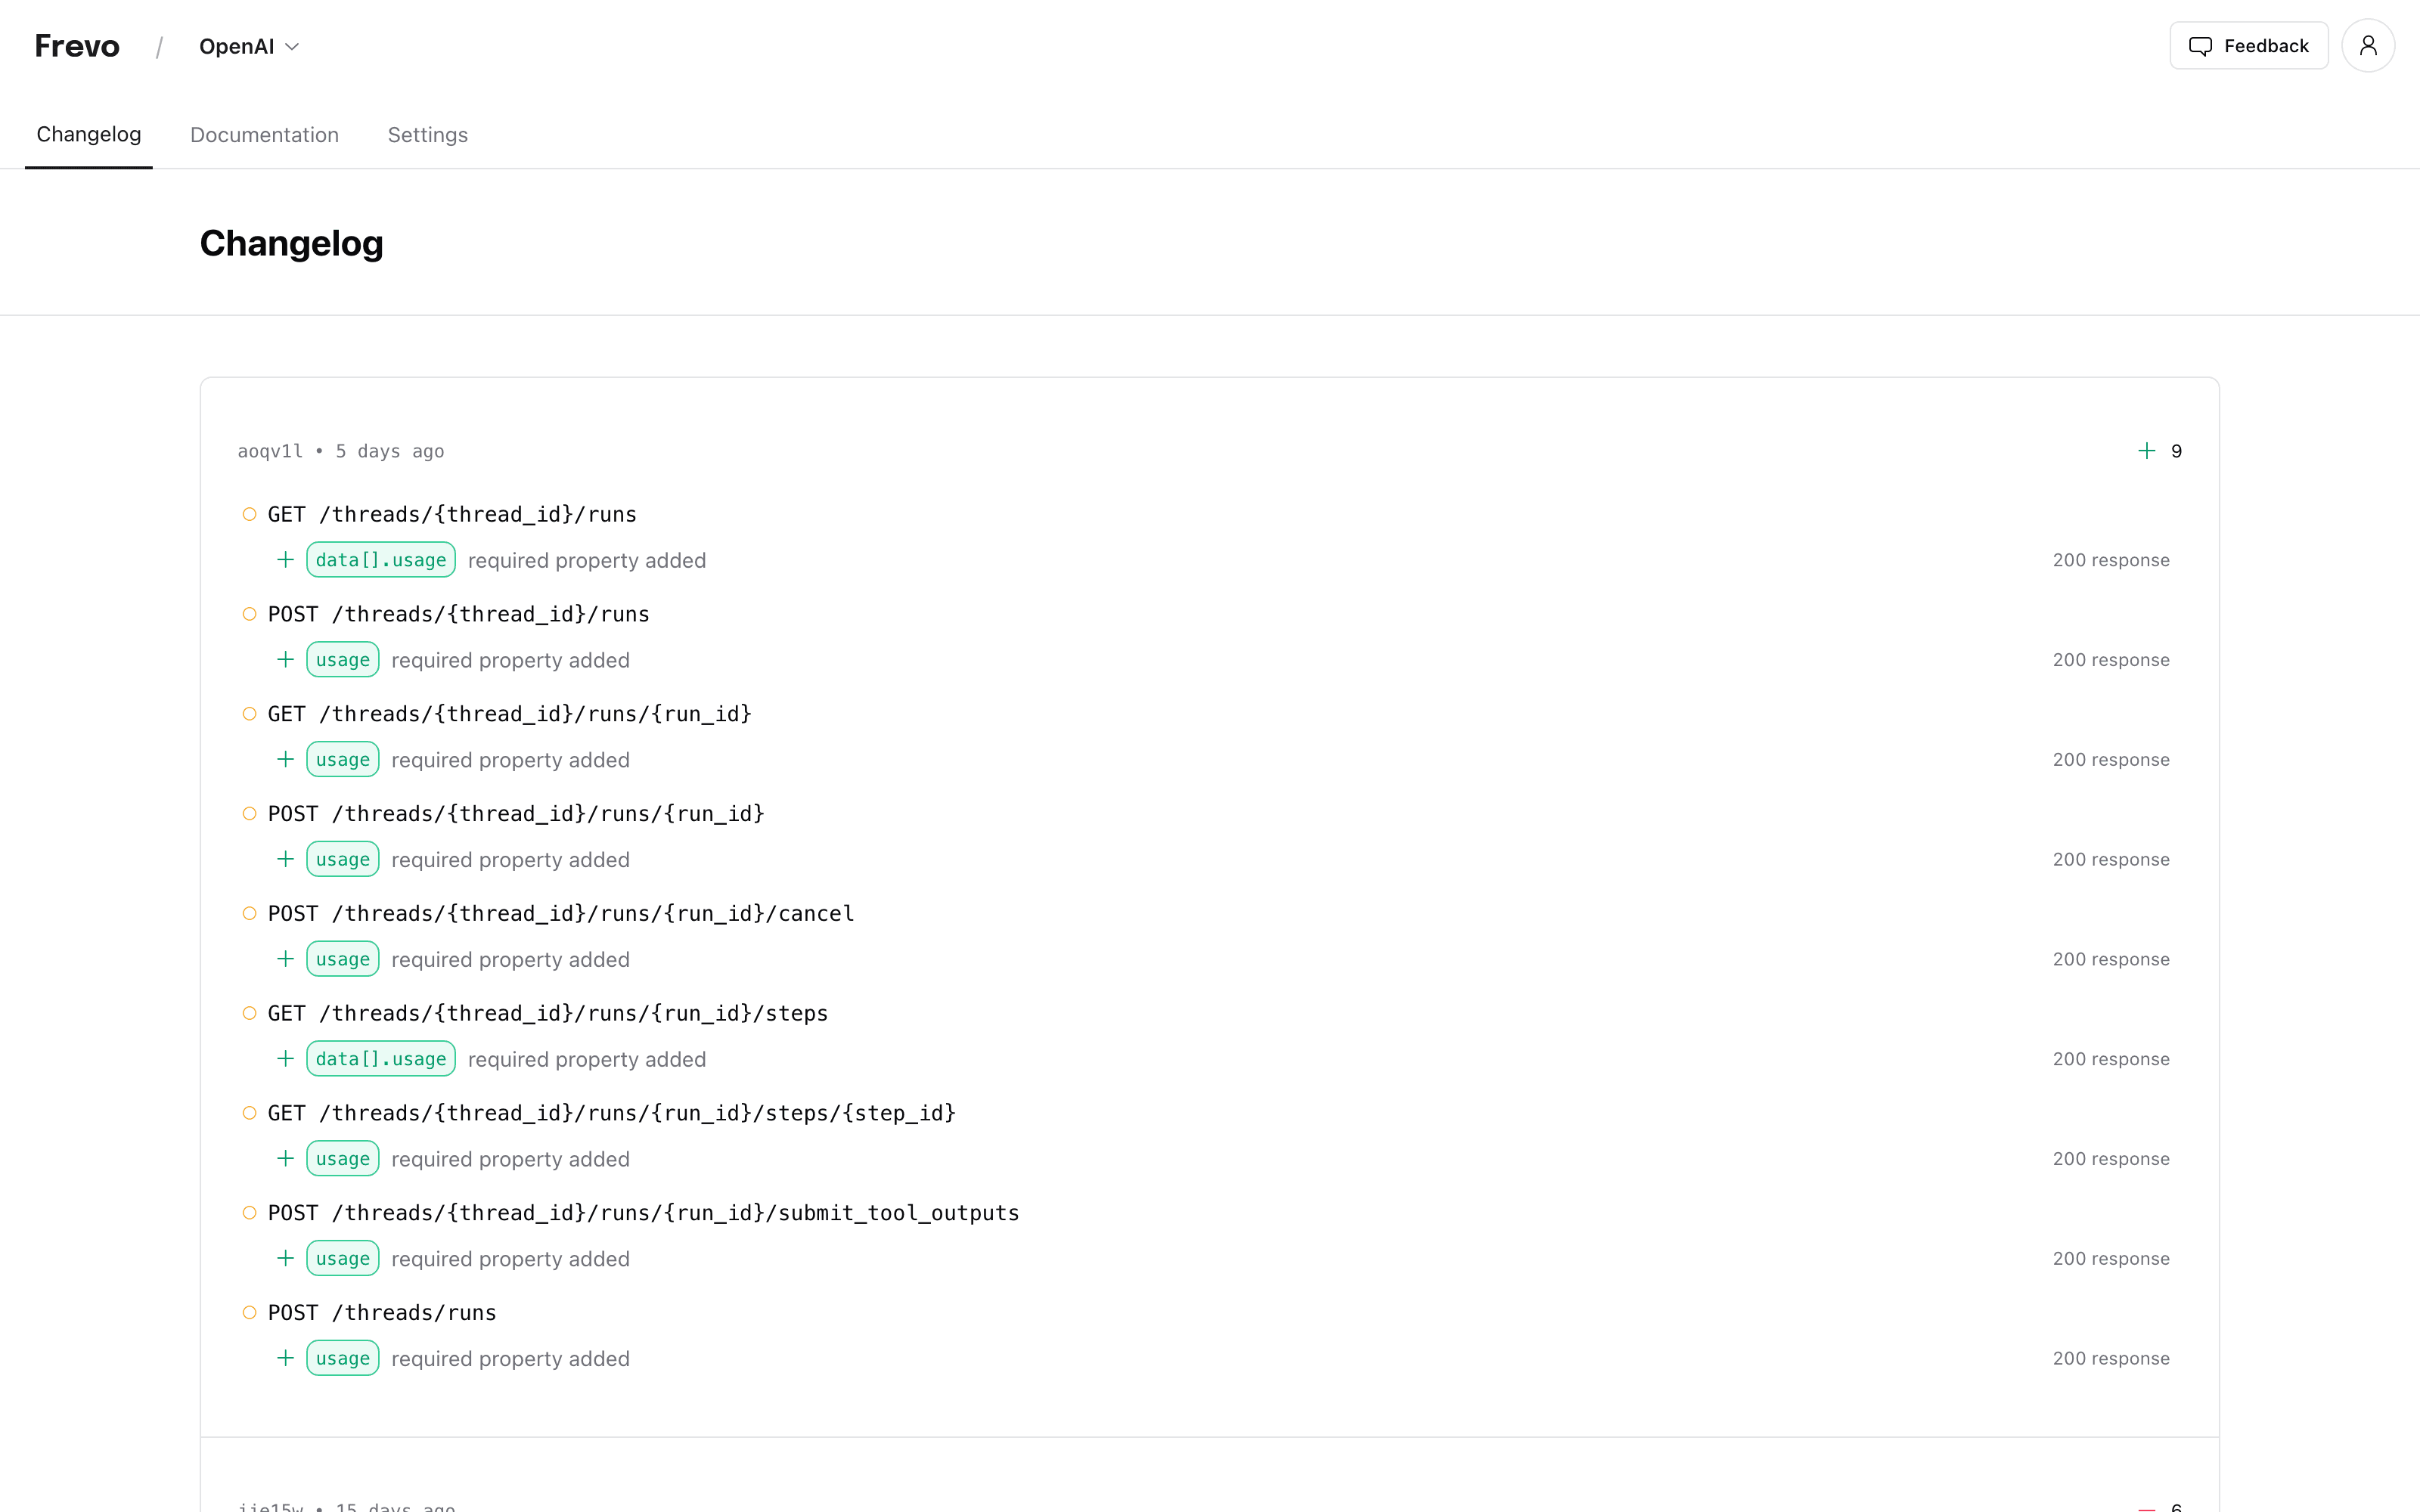
Frevo
Frevo
Frevo
Queie
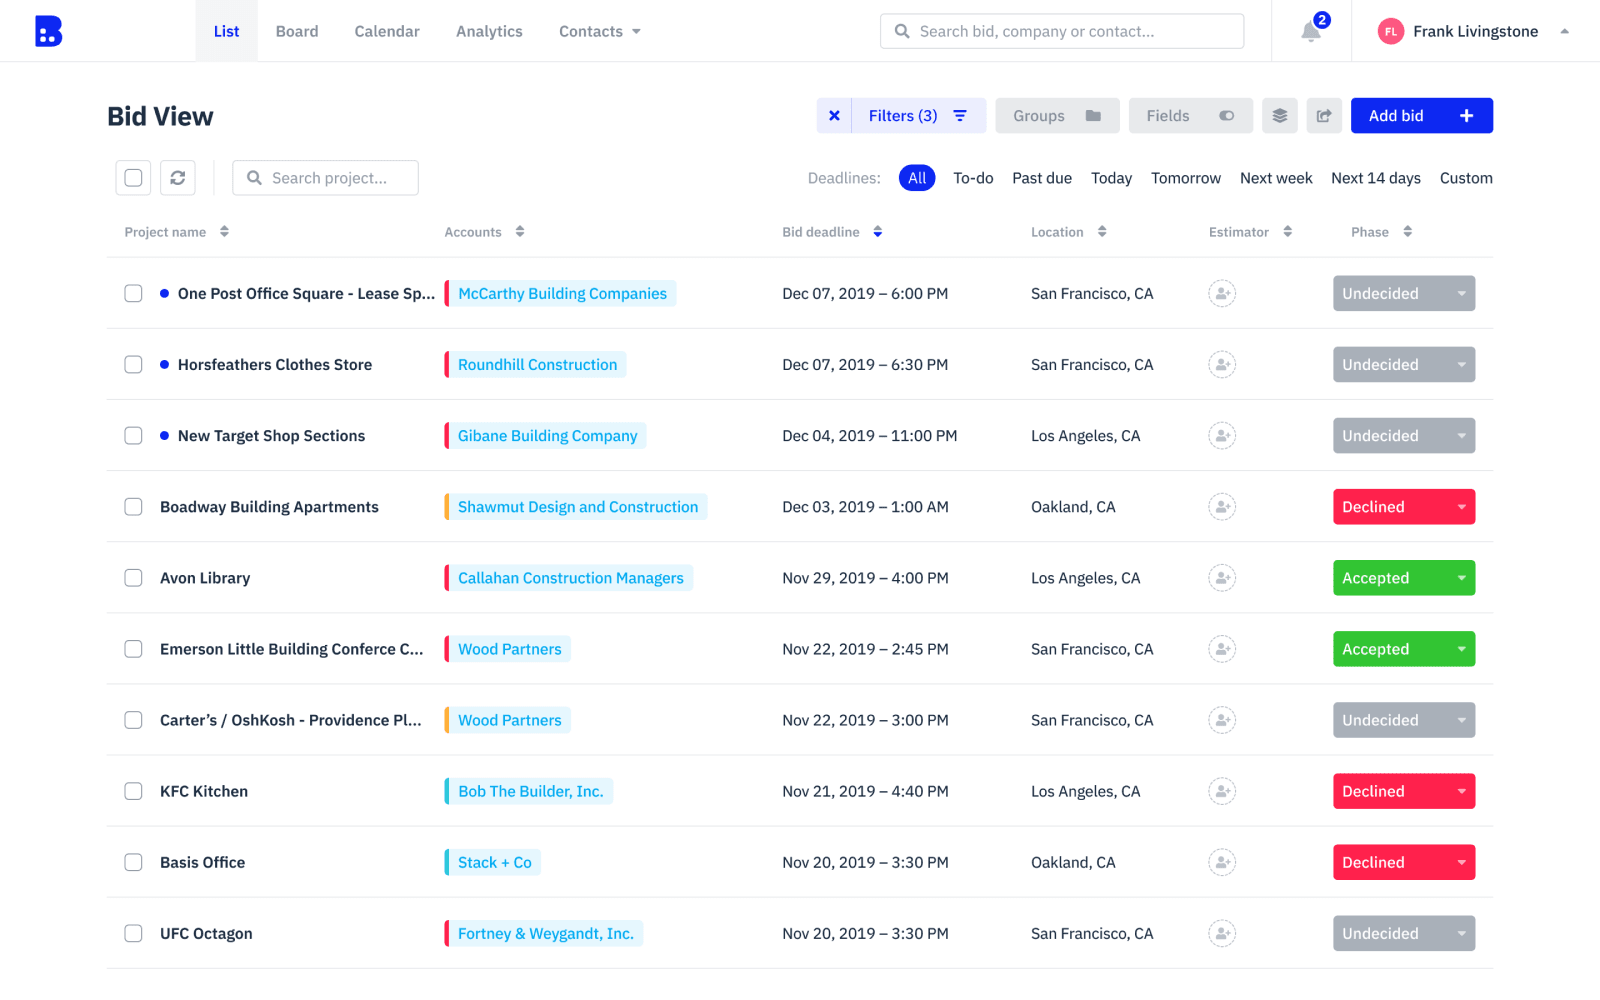
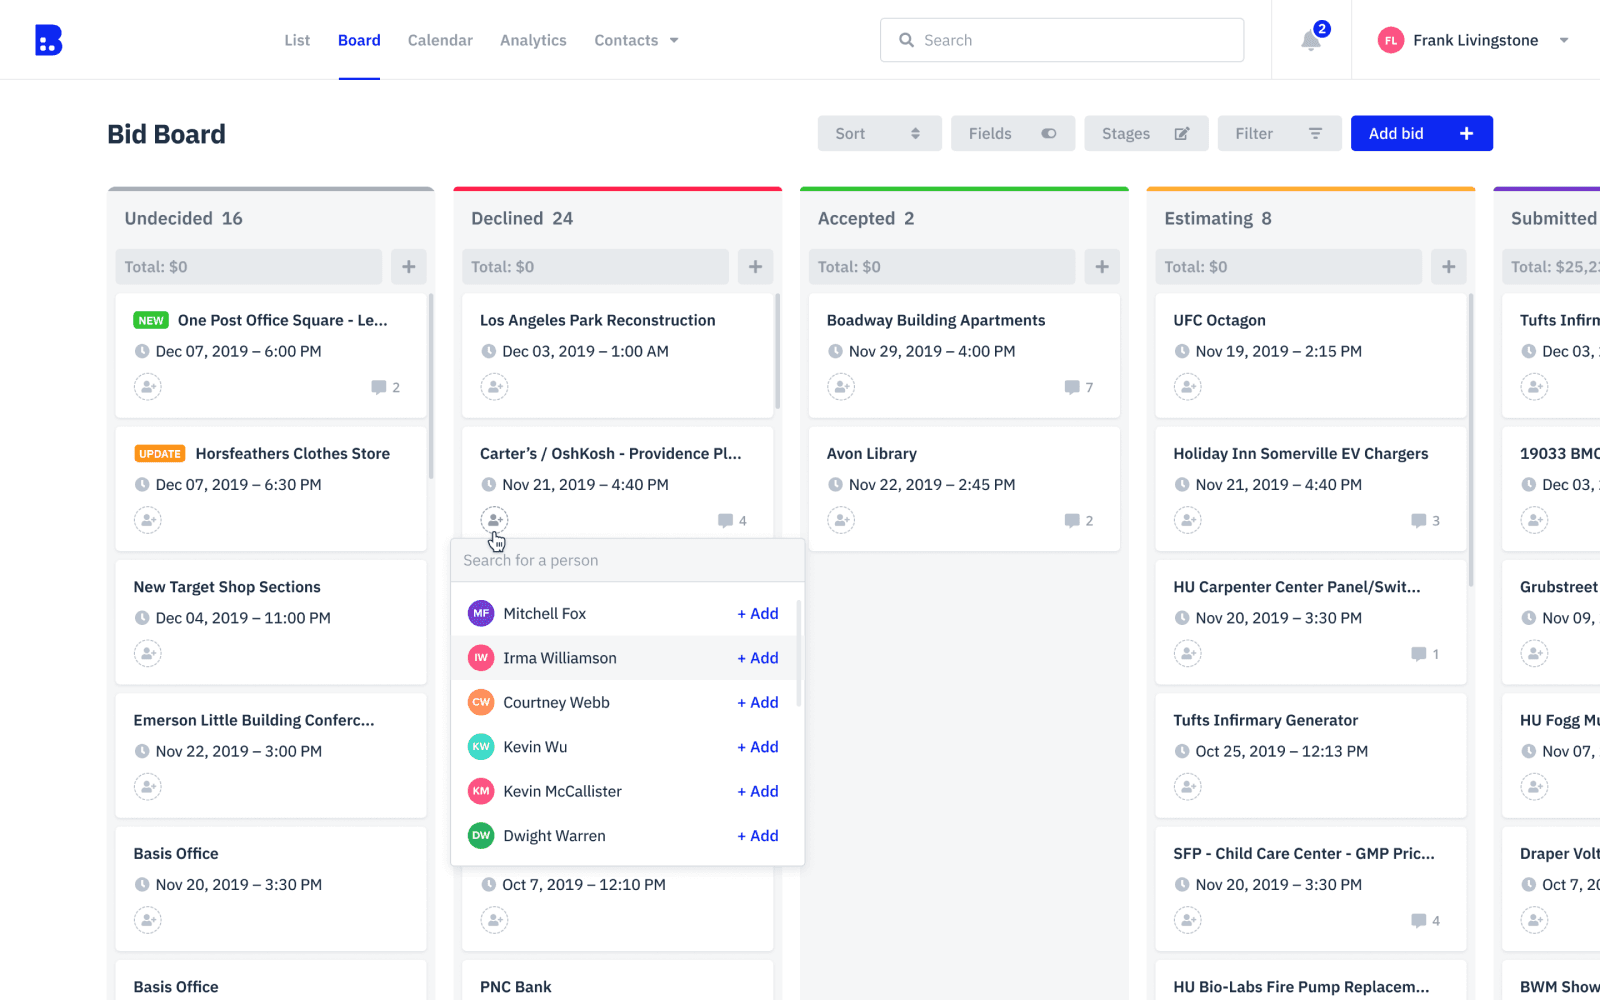
BasisBoard (Downtobid)
BasisBoard (Downtobid)
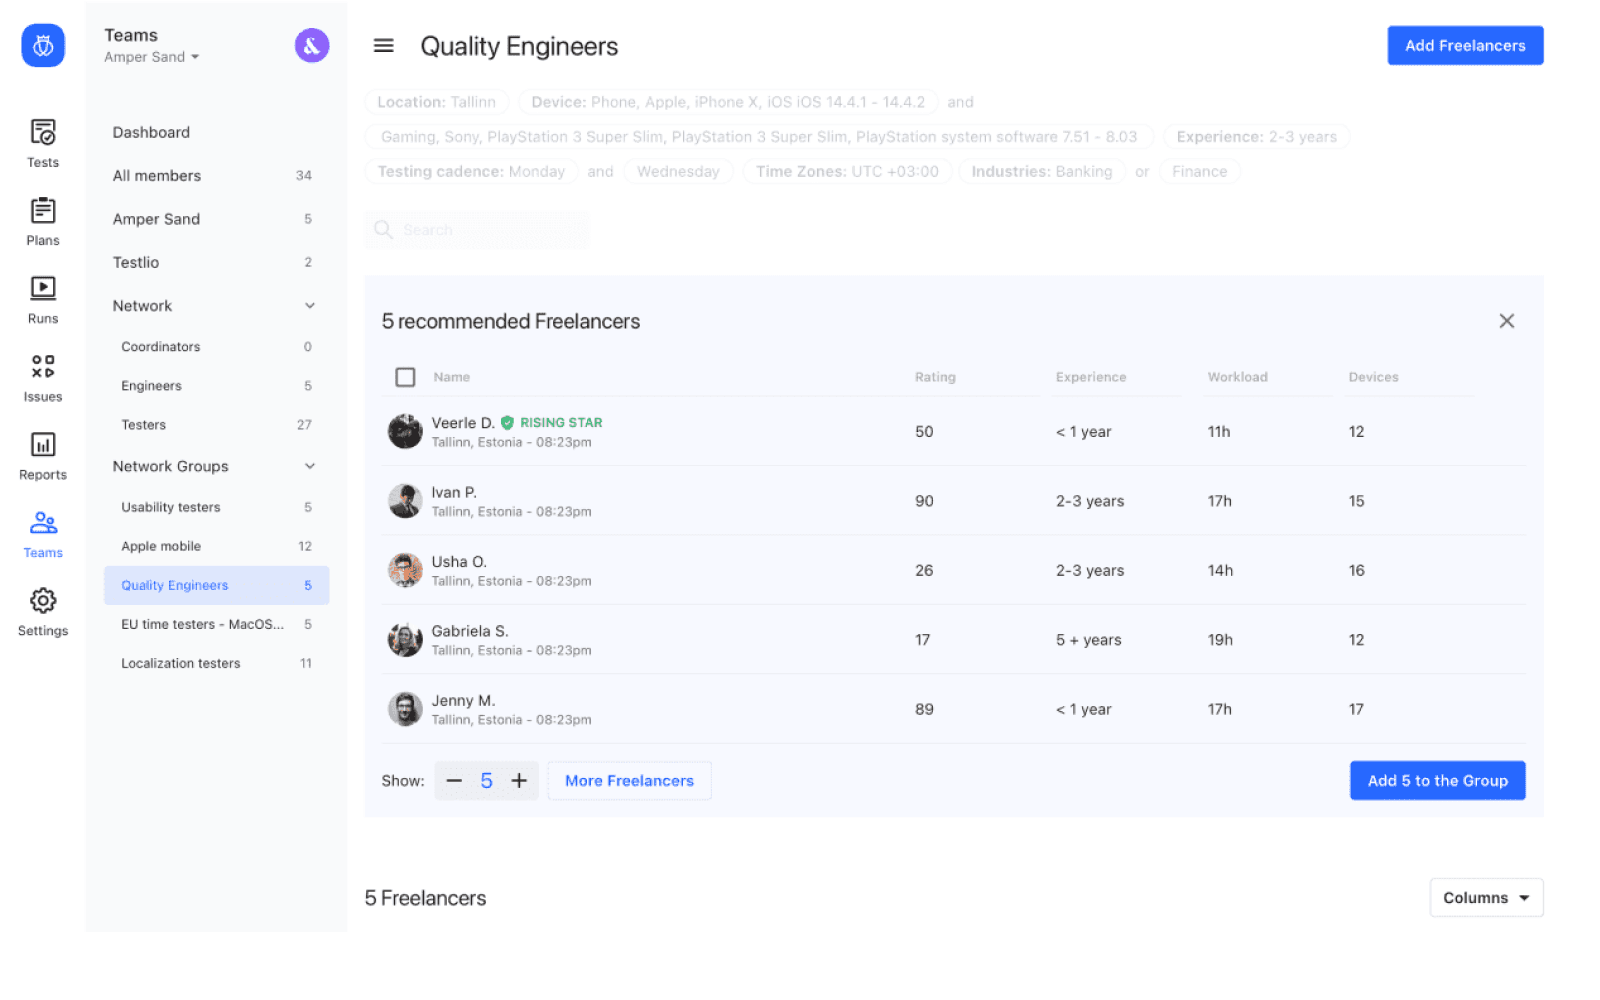
Testlio
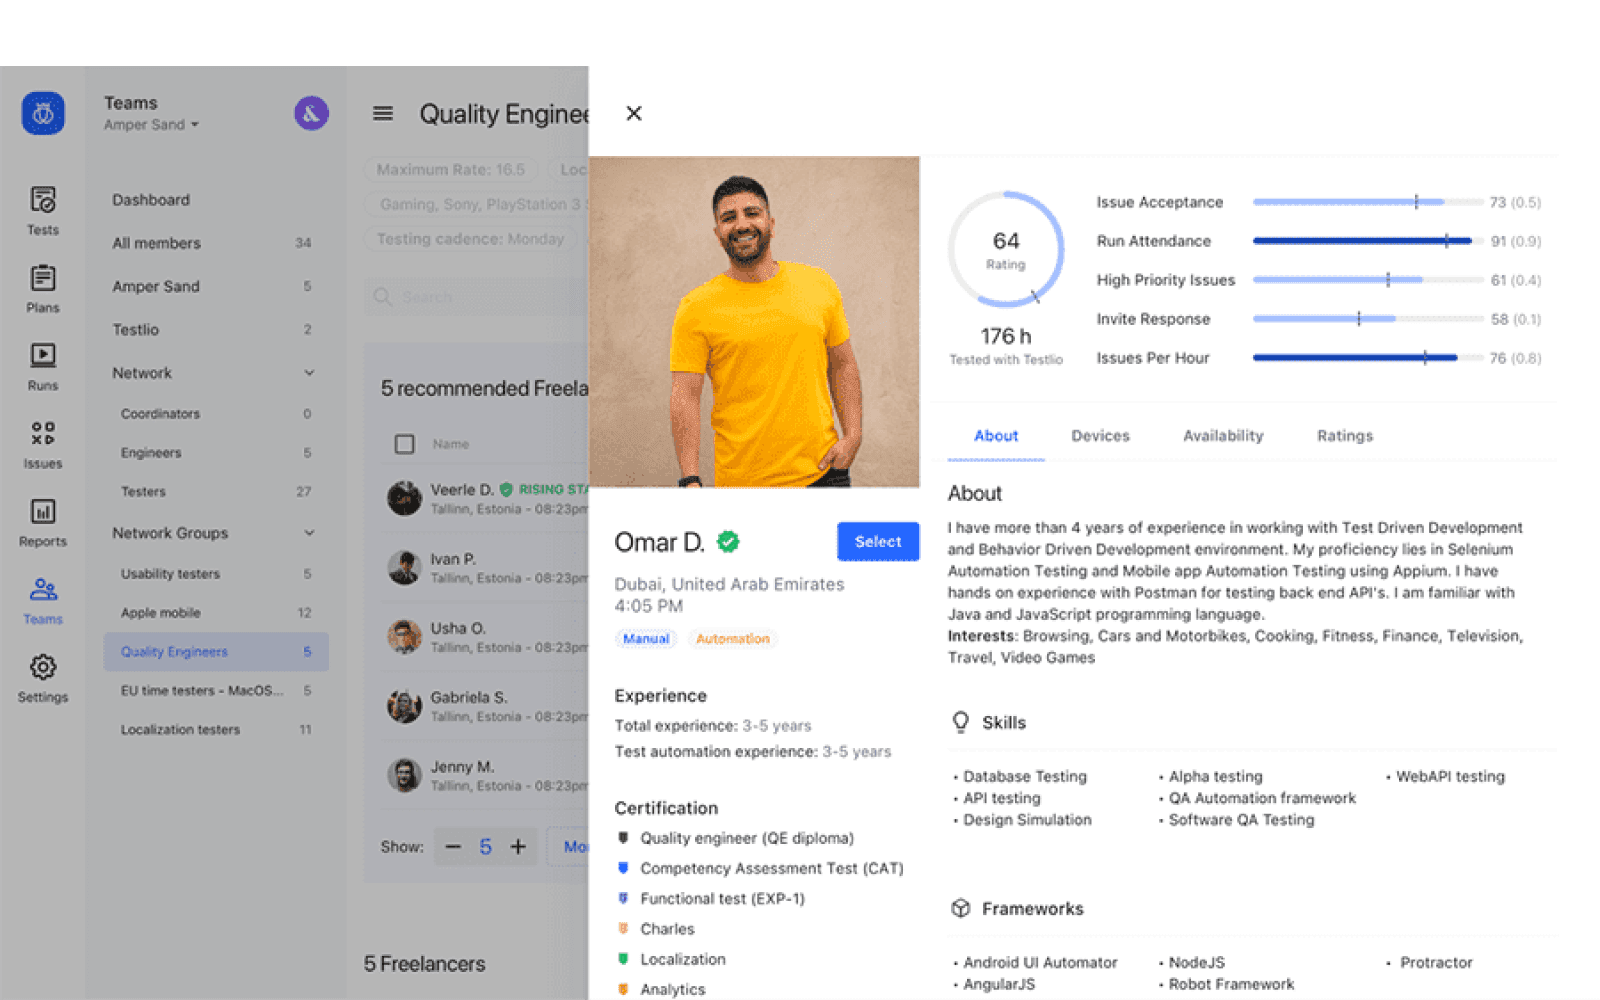
Testlio
Intercom2Slack
 Frevo
Frevo 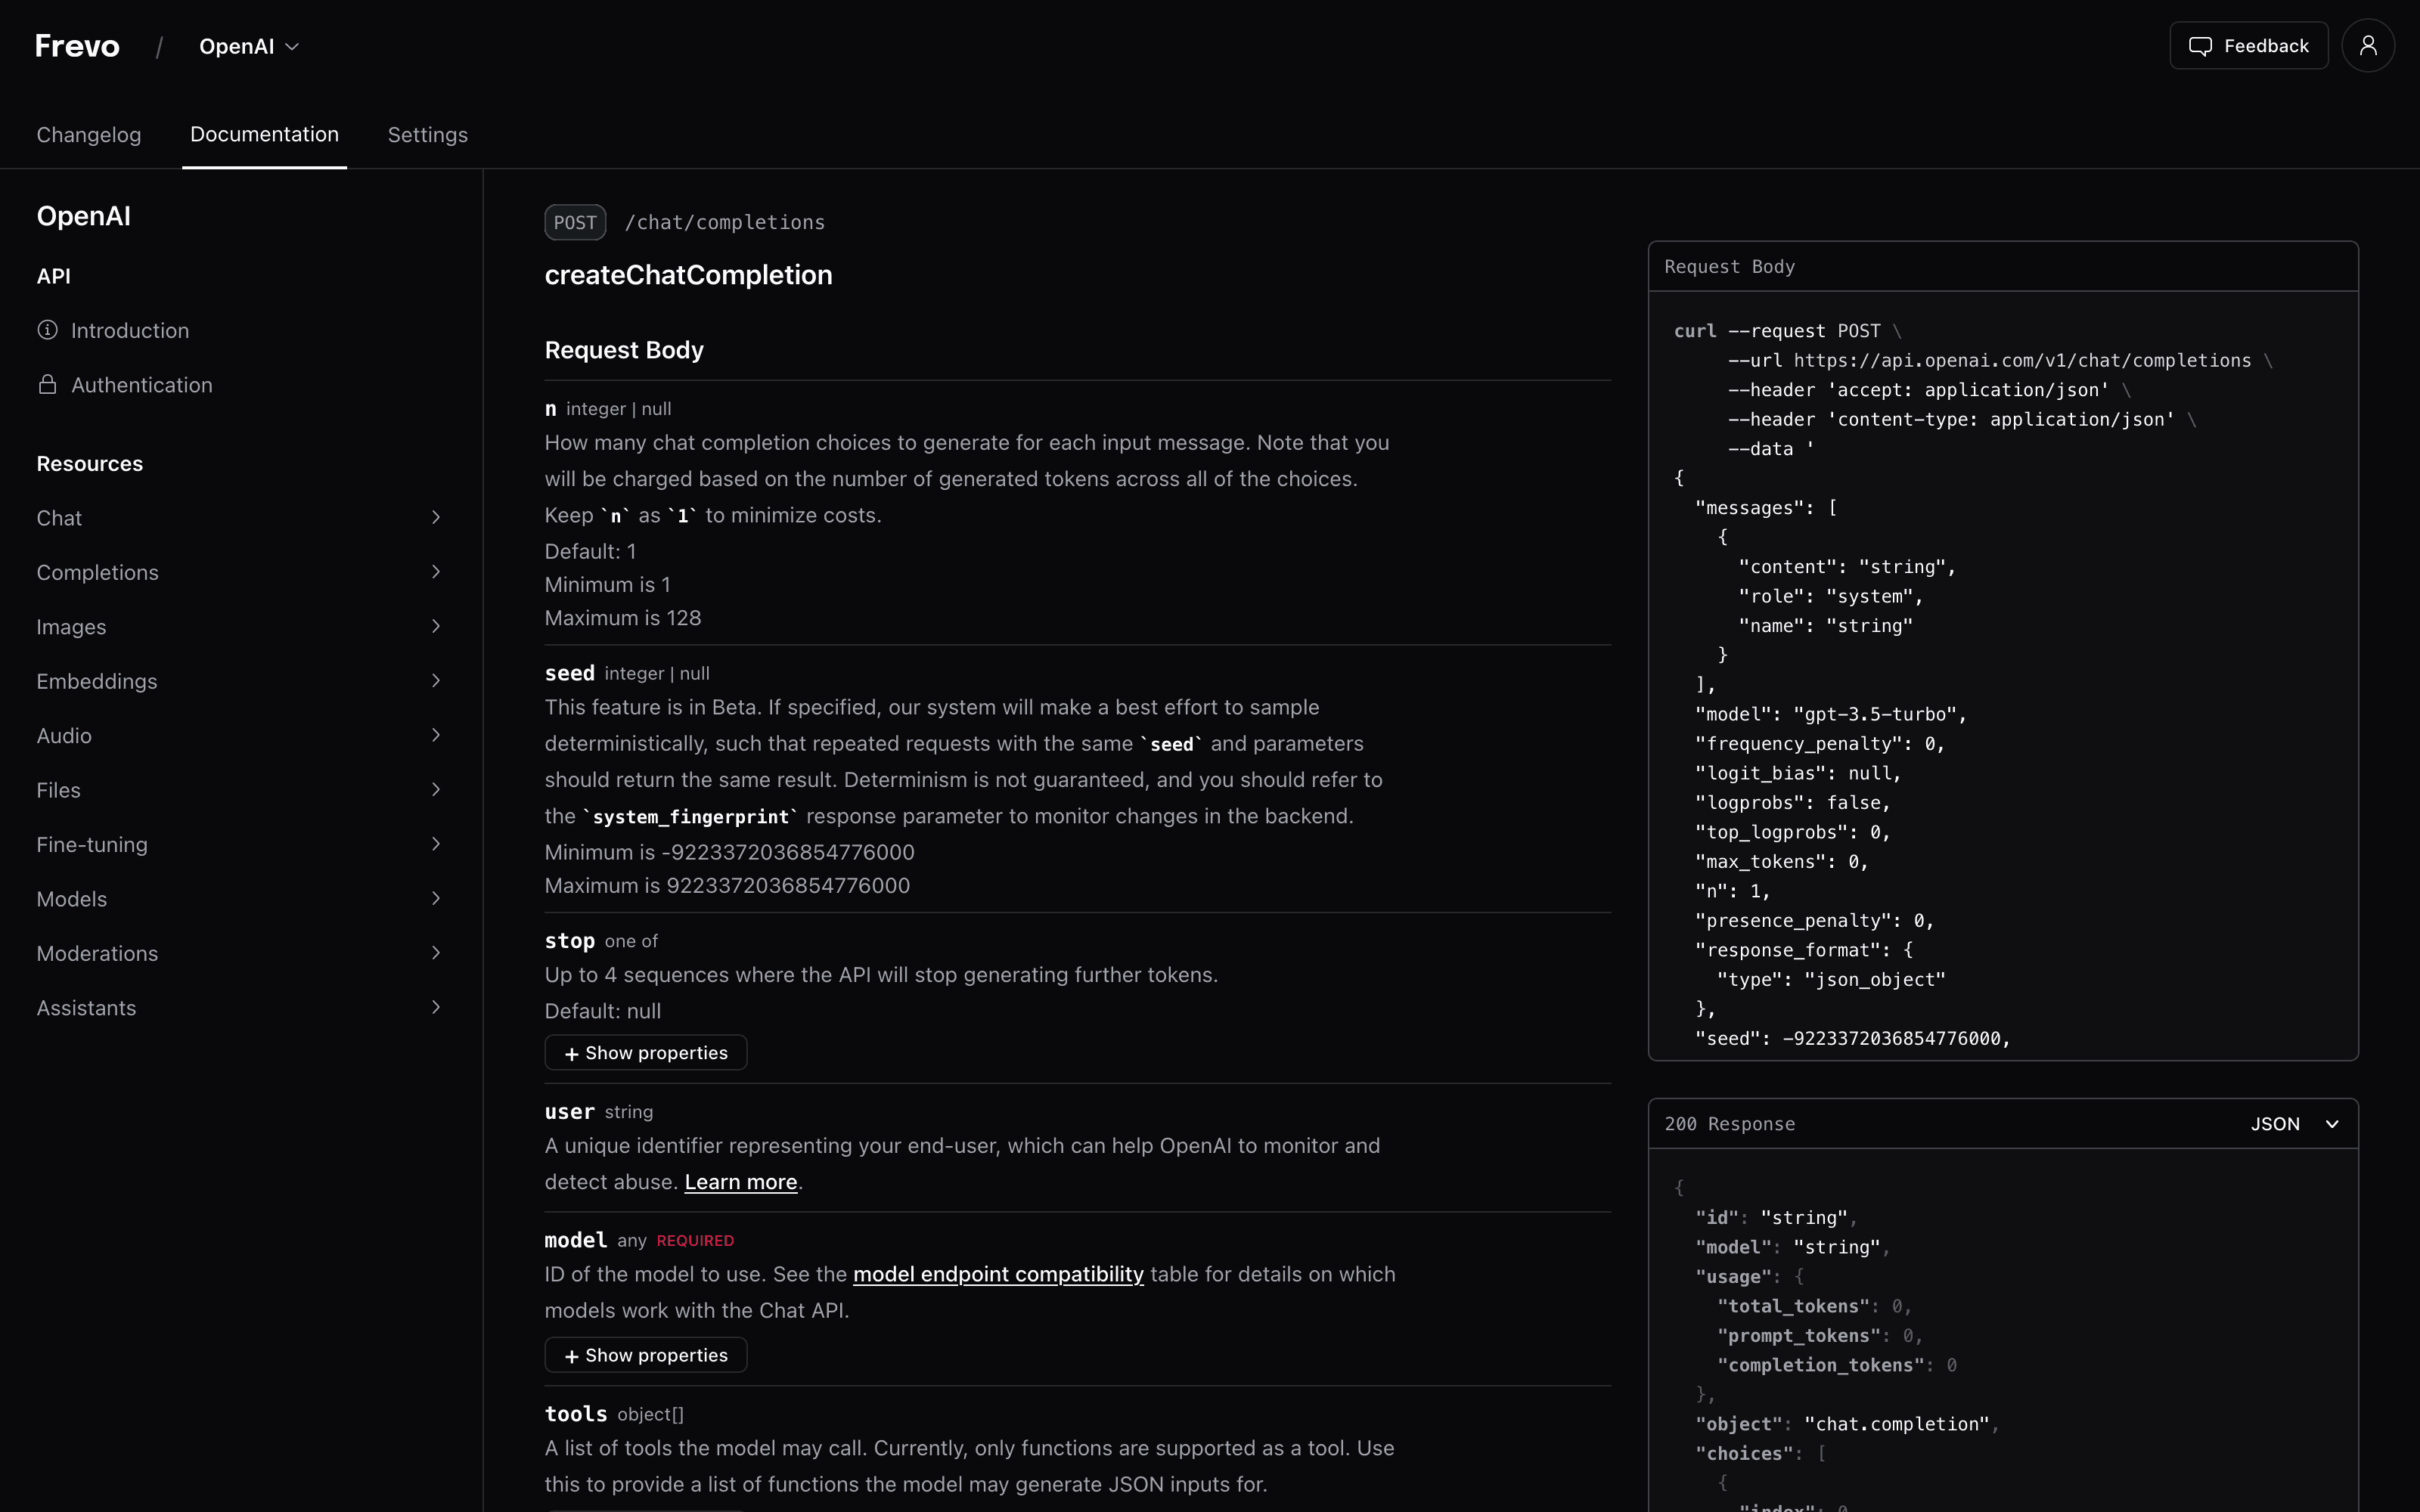 Frevo
Frevo 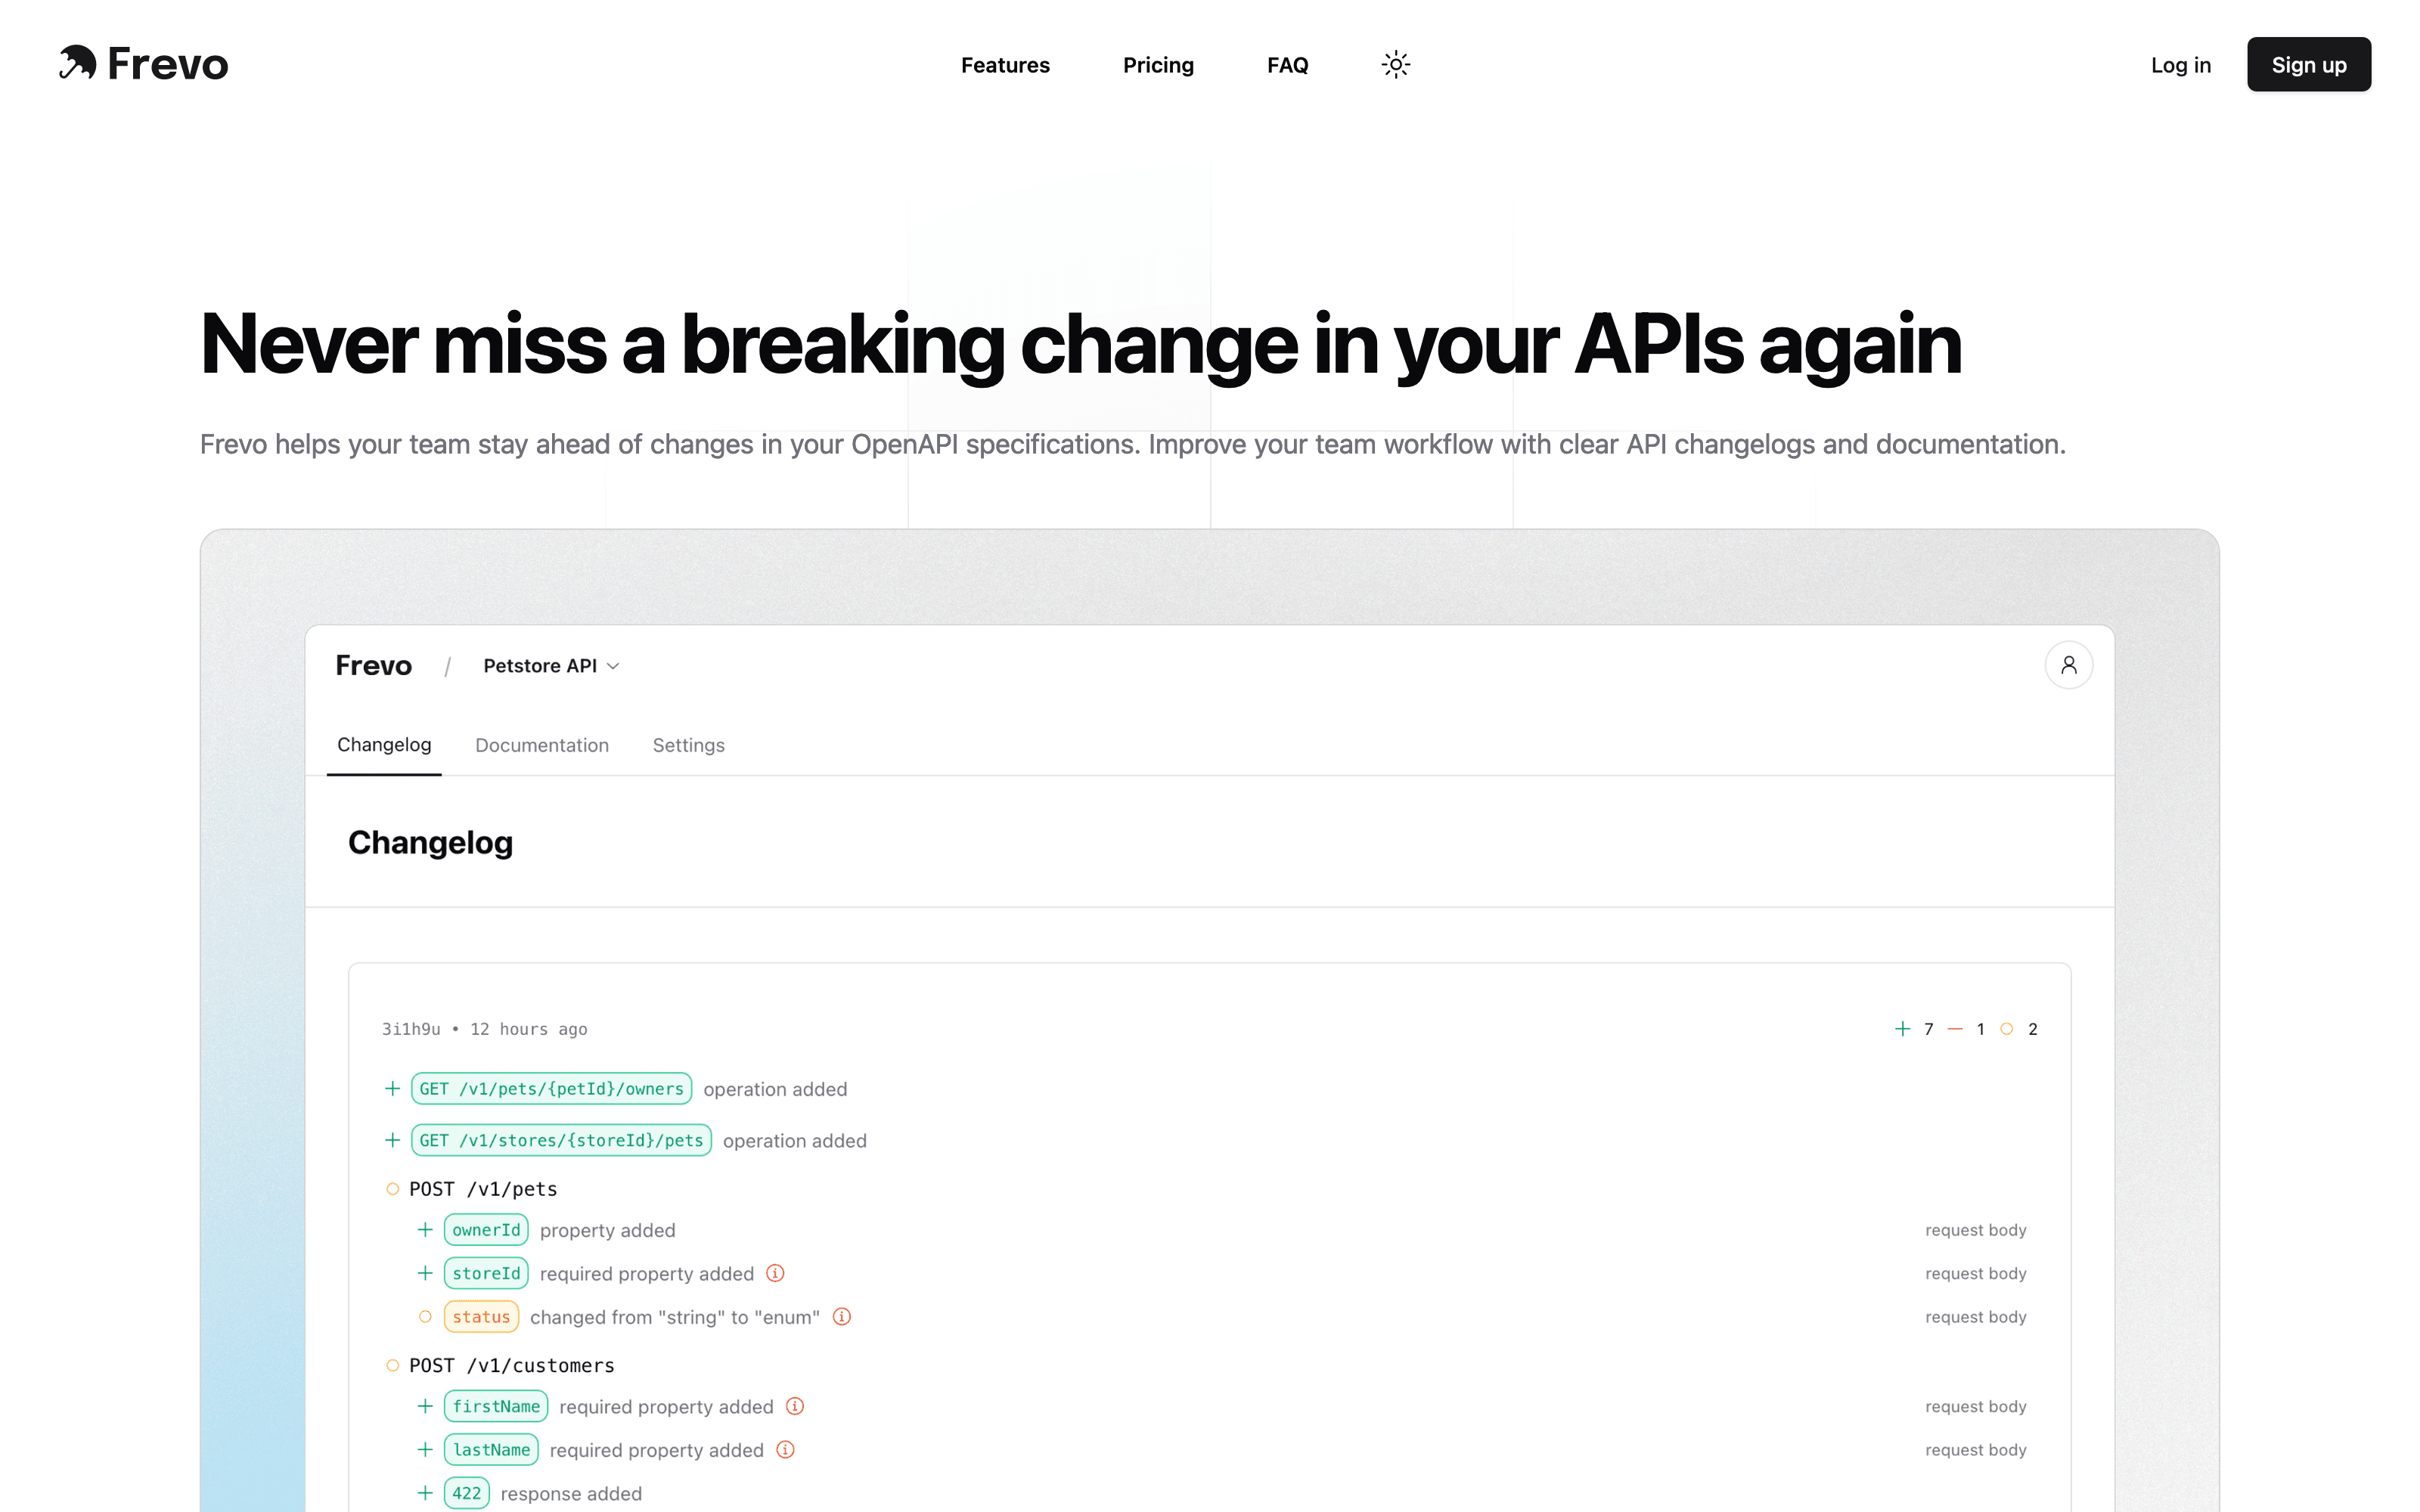 Frevo
Frevo  Queie
Queie 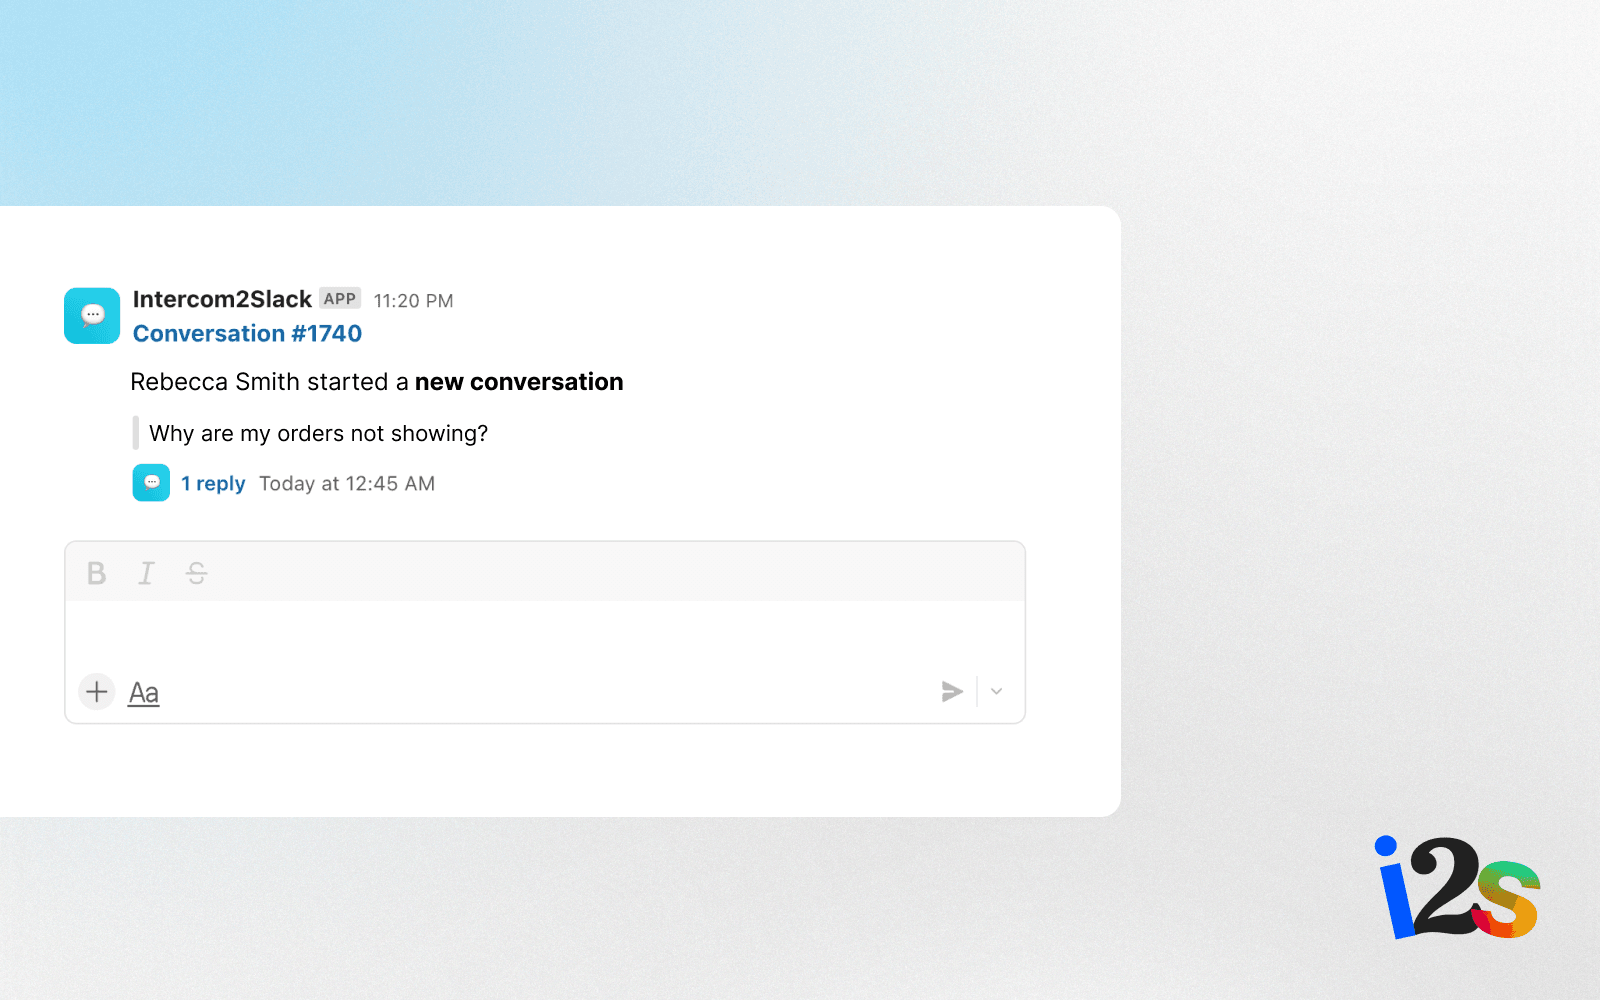 Intercom2Slack