Uploading Files to Cloudflare R2 with Pre-Signed URLs
Learn how to upload files to Cloudflare R2 using pre-signed URLs.
Cloudflare R2 is an object storage service that lets you store files in the cloud. If you’ve heard of Amazon S3 or Google Cloud Storage, R2 works in a similar way.
The key difference between R2 and other storage services is that it doesn’t charge you anything for downloading your files (known as egress fees). This can save you a significant amount of money depending on your application and how many users you have.
In this article, you will learn how to upload files to an R2 bucket using pre-signed URLs. We will leverage the fact that R2 provides S3-compatible APIs and use some of its libraries. The code samples are written using Node.js (server) and React (client).
A GitHub repository with the full code is available here.
What are pre-signed URLs?
Pre-signed URLs are a secure way to grant temporary access to a specific operation in your bucket.
For example, you can create a URL that allows uploading files to a bucket, or another URL that allows downloading a specific file.
These “permissions” are encoded (signed) in the URL. Other information, such as the expiration time and additional headers, can also be included.
A big advantage of using pre-signed URLs for uploading files is that it reduces the load on your server. The upload is made at the cloud provider’s expense (Cloudflare in this case). This can be useful if your application handles large amounts of user-submitted content.
Prerequisites
- A Cloudflare account. You can create one at cloudflare.com.
- An R2 bucket. Check instructions on how to create one here.
Setting up your bucket
Configure a CORS policy
A CORS policy is a group of rules that define which domains are allowed to access your bucket. It also specifies which HTTP methods can be used when making requests.
In Cloudflare R2, a CORS policy is defined as a JSON object. Look for “CORS Policy” in your bucket Settings. There you can add or update your policy
Below is an example of a CORS policy that allows requests from localhost:3000 using the GET and PUT methods:
[
  {
    "AllowedOrigins": ["localhost:3000"],
    "AllowedMethods": ["GET", "PUT"],
    "AllowedHeaders": ["Content-Type"]
  }
]When going to production, make sure to update your CORS policy to reflect real security requirements of your application. Your production bucket should also be different from your development one.
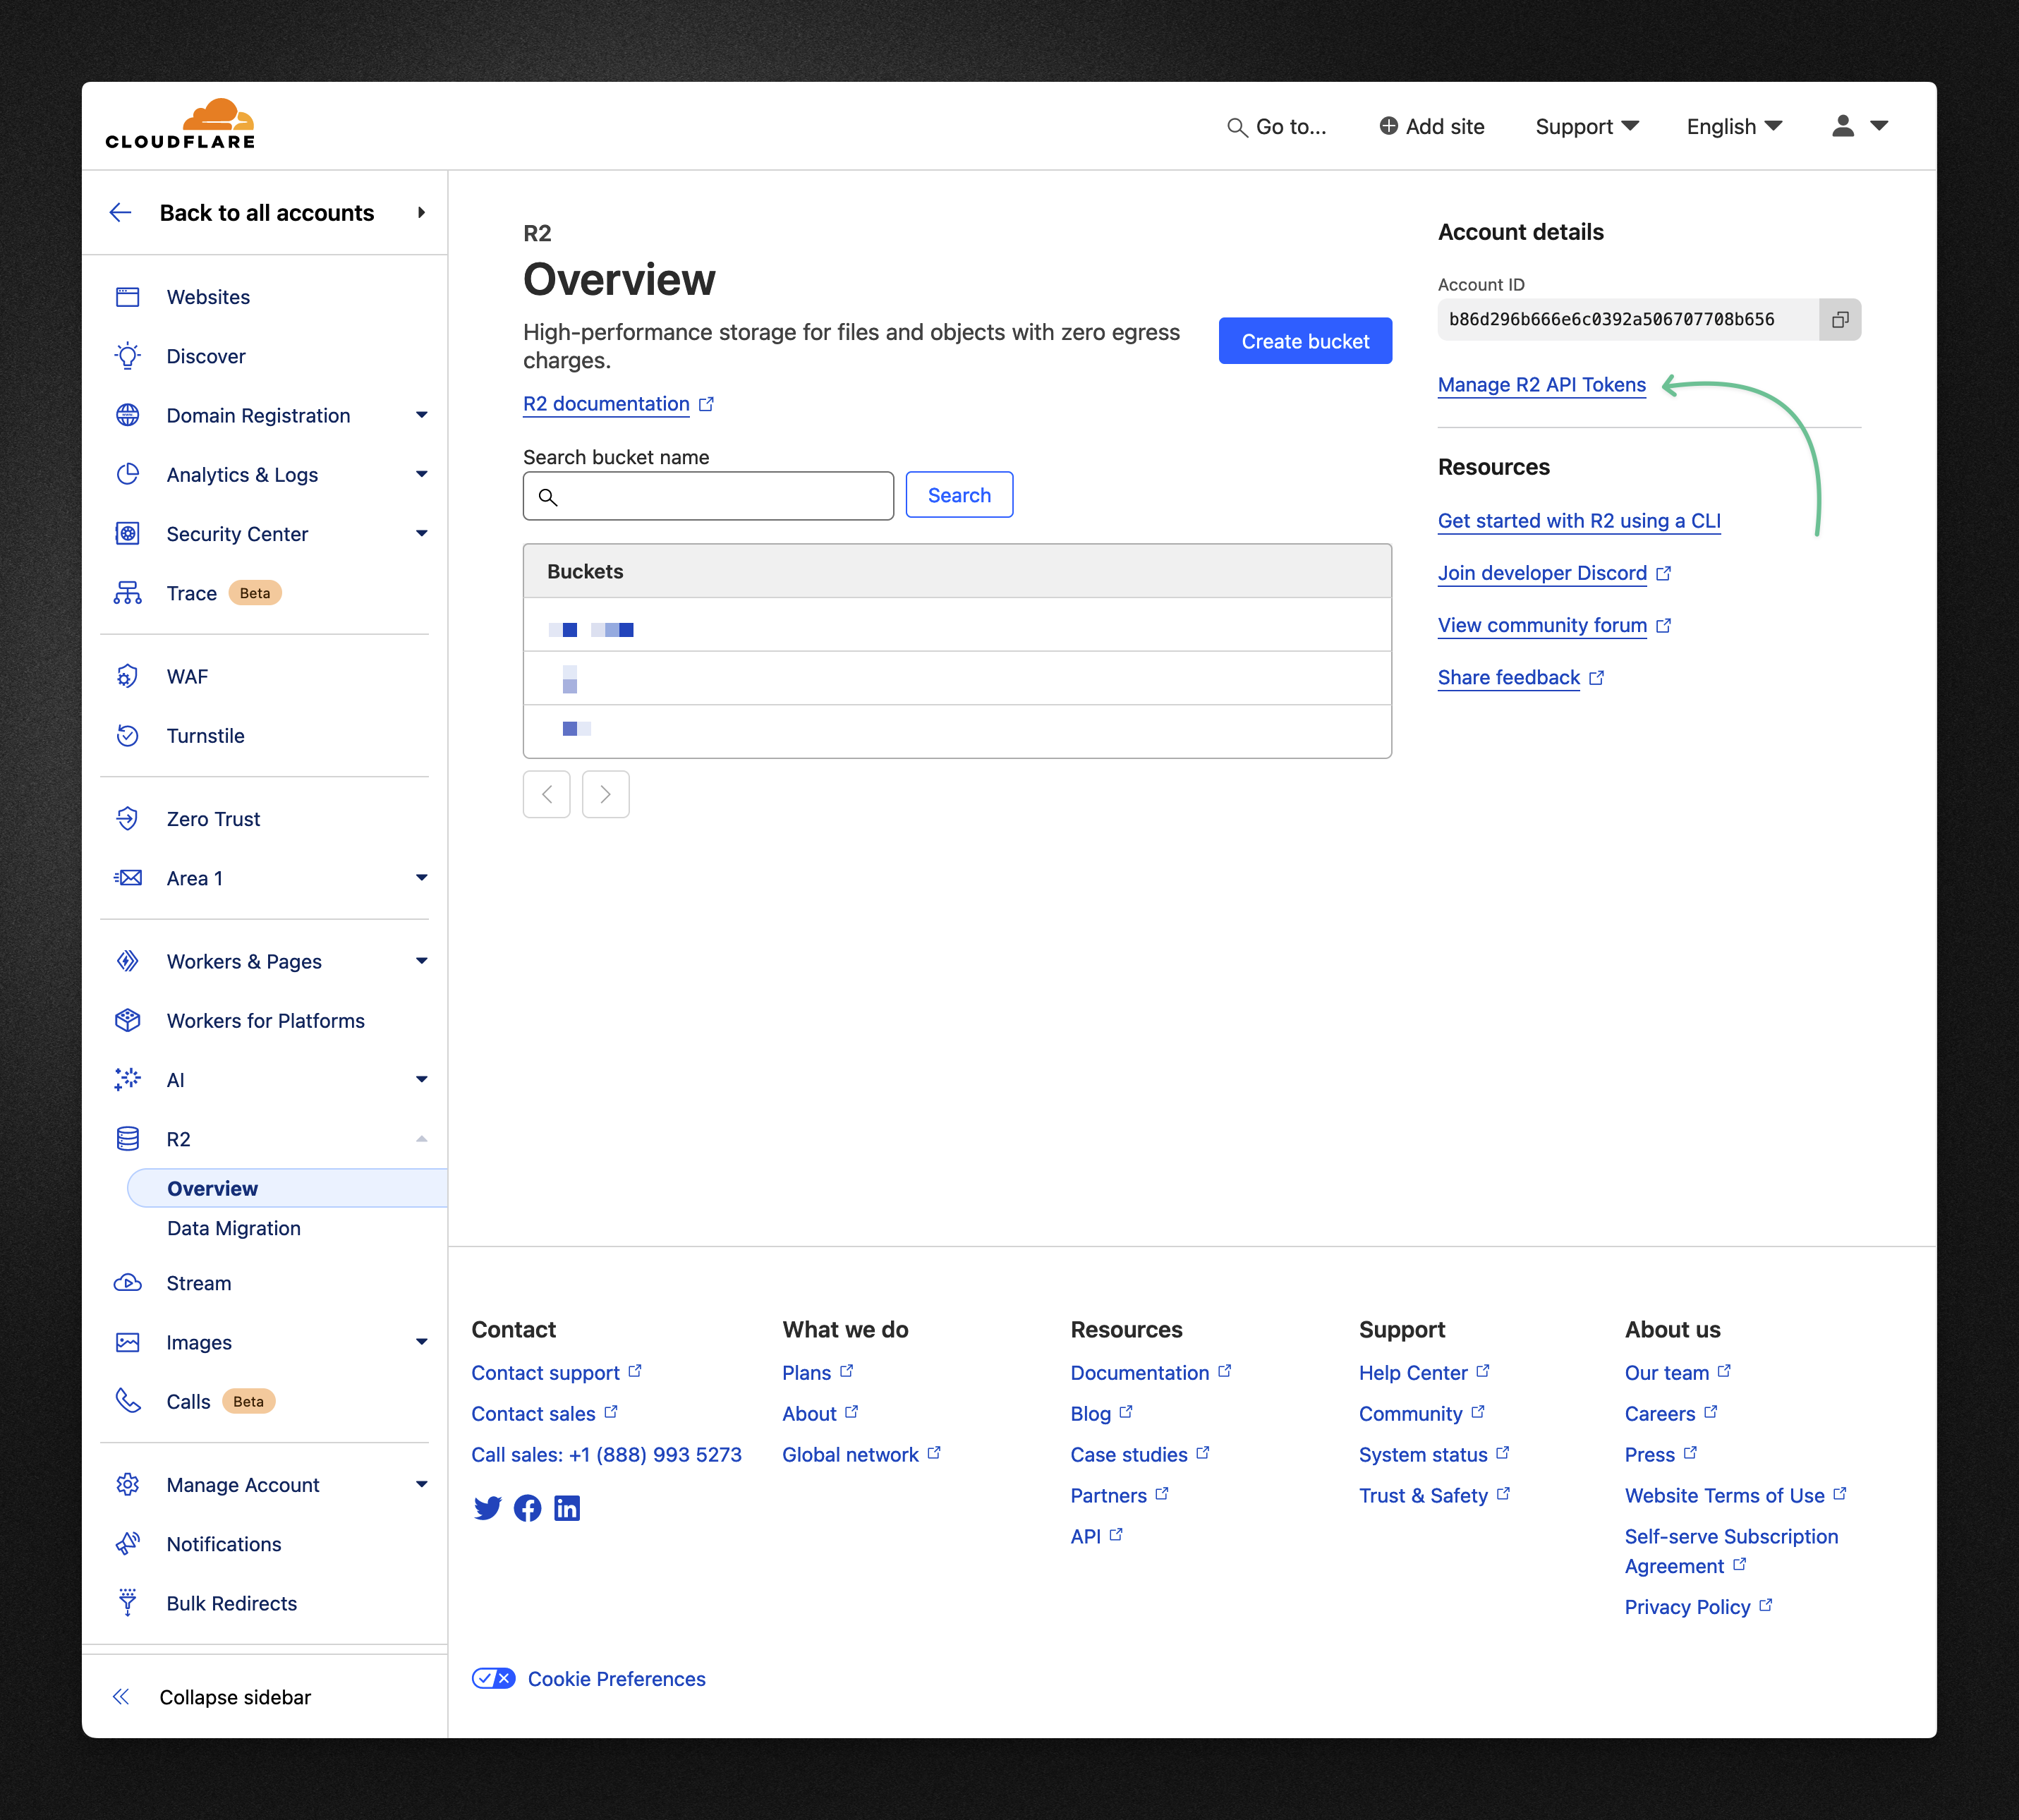
Create an R2 API token and S3 credentials
In the “R2” overview page, click on “Manage R2 API Tokens” and follow the steps to create a new token.
After that, you will then see a page with all the credentials that were generated for the bucket. Here we are interested in the S3 credentials.
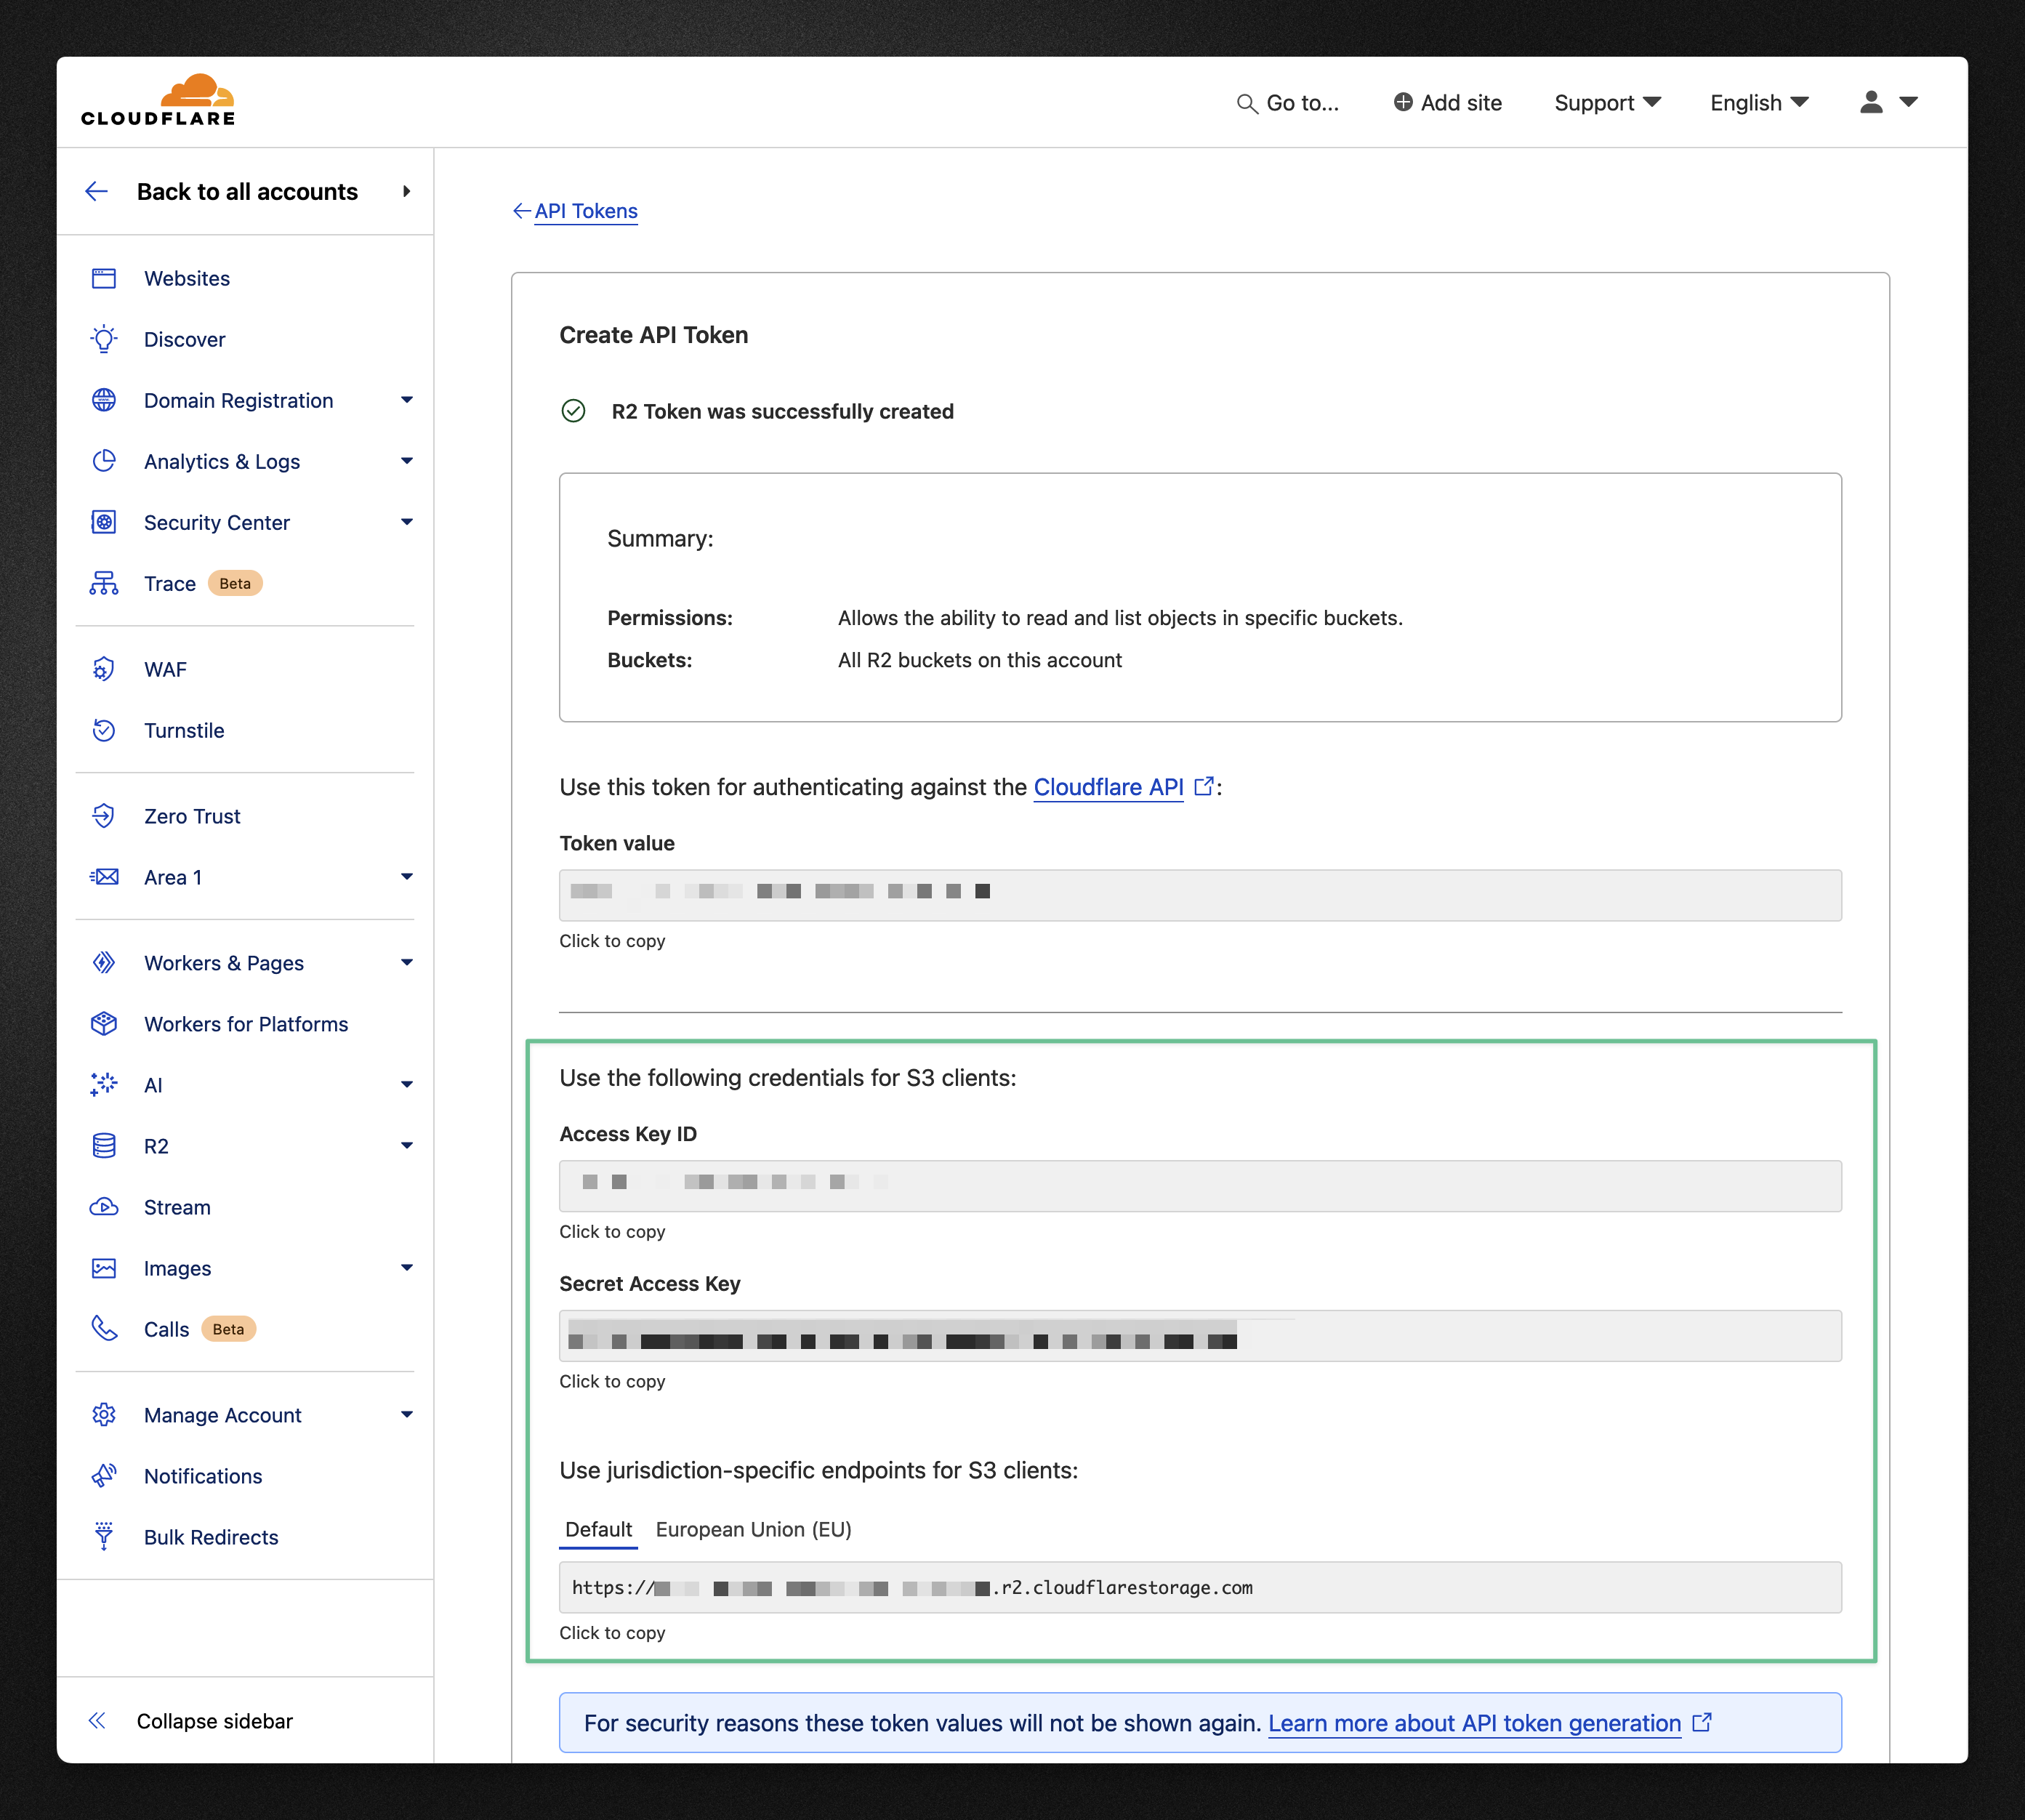
Copy the Access Key ID, Secret Access Key, and the S3 endpoint and store then in a safe place, like in your .env file for example. We will be referencing them later in the code.
Here’s how I store them in my .env file:
R2_ACCESS_KEY_ID=<key-id>
R2_SECRET_ACCESS_KEY=<secret-key>
R2_ENDPOINT=<endpoint>
R2_BUCKET=<bucket-name>
Creating the server
Let’s create a simple HTTP server in Node.js. I am using Hono as the HTTP framework, but the same logic can be applied to other frameworks like Express or Fastify.
import { serve } from '@hono/node-server'
import { Hono } from 'hono'

const app = new Hono()

app.post('/pre-signed-url', async (c) => {
  // @TODO: Hold tight! We will add our main logic here.
})

serve({ fetch: app.fetch, port: 3000 })

console.log('🌎 listening on port 3000')
Now let’s install these two libraries:
npm install @aws-sdk/client-s3 @aws-sdk/s3-request-presignerWait, AWS S3? Pre-signed URLs are originally a feature from AWS S3. Because Cloudflare provides a good level of compatibility with S3, we can use most of its libraries. This also helps if you are migrating from AWS S3 to Cloudflare R2.
With the libraries installed, you can initialize a new R2 client:
export const r2 = new S3Client({
  region: 'auto',
  endpoint: process.env.R2_ENDPOINT!,
  credentials: {
    accessKeyId: process.env.R2_ACCESS_KEY_ID!,
    secretAccessKey: process.env.R2_SECRET_ACCESS_KEY!,
  },
})
Now let’s go back to our server code and implement the POST /pre-signed-url endpoint:
// ...

app.post('/pre-signed-url', async (c) => {
  // How the file will be identified in the bucket
  const key = randomUUID()

  // The bucket name
  const bucket = process.env.R2_BUCKET

  // Generate a pre-signed URL for uploading the file
  const url = await getSignedUrl(r2, new PutObjectCommand({ Bucket: bucket, Key: key }))

  return c.json({ key, url })
})
Let’s pause for a moment to understand what’s happening.
The key variable is a unique idetifier for the file in your bucket. I’m using a random UUID for both simplicity and to avoid collisions, but you can get creative and append a unique ID (e.g. nanoid) to the original file name, for example.
The bucket variable is the name of your R2 bucket. It’s stored in an environment variable to allow having different buckets for each environment (development, production, etc.).
Finally, we call getSignedUrl from S3 Request Pre-signer to generate a pre-signed URL. I’m passing a PutObjectCommand, which means that the URL is authorized to perform “Put Object”-type operations in the bucket (in other words, upload a file).
Both the key and the url are returned to the client.
Creating the frontend
For the frontend part, I choose to go with a basic Vite + React application. There’s very little of React in this, so translating it to your favourite frontend framework should be straightforward.
A minimal component that uploads a file to R2 looks like this:
export function Upload() {
  const handleFileChange = async (event: React.ChangeEvent<HTMLInputElement>) => {
    const file = event.target.files?.[0]!

    // 1. Get the pre-signed URL
    const url = 'http://localhost:3000/pre-signed-url'
    const response = await fetch(url, { method: 'POST' })

    const { url: uploadUrl } = await response.json()

    // 2. Upload the file
    await fetch(uploadUrl, { method: 'PUT', body: file })
  }

  return (
    <div>
      <input type="file" onChange={handleFileChange} />
    </div>
  )
}
When a file is selected, the handleFileChange function is called. It sends a POST request to the server to get the pre-signed URL. Then, it sends a PUT request (this time to Cloudflare’s server) to the URL to upload the file.
Accessing your file
After uploading a file, you will probably want to display it somewhere to your users. There are multiple ways to do this, depending on your requirements. Here are a few options:
Custom domains
Grants access to a specific domain to all files in your bucket. The only gotcha is that the domain needs to be managed by Cloudflare.
R2.dev domain
In your bucket “Settings” page, you can enable public access to your bucket and access your files using a special r2.dev URL. This option is rate-limited and is not recommended for production.
Pre-signed URLs (yes, again!)
If none of these work for you, you can generate pre-signed URLs that allow dowloading a file. This is similar to what we did for uploading, but this time the authorized operation is a “Get Object”.
You can add a new endpoint to your server that generates these URLs:
app.get('/file/:key', async (c) => {
  const key = c.req.param('key')

  const bucket = process.env.R2_BUCKET

  // (!) We're now signing the URL with a GetObjectCommand
  const url = await getSignedUrl(r2, new GetObjectCommand({ Bucket: bucket, Key: key }))

  return c.json({ url })
})
And then, in the frontend, you can fetch the pre-signed URL and use it to access the file:
export default function () {
  const handleFileChange = async (event: React.ChangeEvent<HTMLInputElement>) => {
    // ...

    // 3. Get the file
    const downloadResponse = await fetch(`http://localhost:3000/file/${key}`)
    const { url: downloadUrl } = await downloadResponse.json()

    window.open(downloadUrl, '_blank')
  }
  // ...
}
Conclusion
In this article, you learned how to upload files to Cloudflare R2 using pre-signed URLs. This is a powerful feature that can help you reduce the load on your server without compromising security.
Cloudflare R2 is a great alternative to other object storage services, especially if you are looking to save money on egress fees. It also provides a good level of compatibility with AWS S3, which makes it easier to migrate from one service to another.
Questions, feedback, or simply found a typo? Feel free to reach out to me on X / Twitter. ✌️